I love movement and I love celebrating, thus I always strive to create movement-rich celebrations. For years, I’ve done a movement advent calendar at the end of the year as a thank you to my readers, and as a way of inspiring people to move more in their daily lives. No fancy equipment, just us moving joyfully together during a busy time of year.
There are three ways to follow along this year. Starting December 1st, move along each day by following Nutritious Movement on Instagram or Facebook, or if you're not on social media or are trying to be there less (a decision we wholly support!) you can find each day's move updated daily below! If you're excited for more, check out the exercises from other advents here:
EXERCISE ADVENT 2014: Walking
EXERCISE ADVENT 2015: Upper Body
EXERCISE ADVENT 2016: Core Strength
EXERCISE ADVENT 2017: You DO Know Squat
EXERCISE ADVENT 2018: Get Heavy
EXERCISE ADVENT 2019: Dynamic Home Advent-ure
EXERCISE ADVENT 2020: With a Twist
EXERCISE ADVENT 2021: Take A Breather
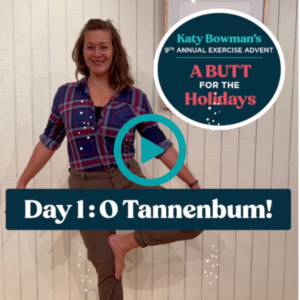
DAY 1: O TANNENBUM!
Kicking this exercise advent off with a simple (butt not easy) “tree” pose.
Standing on one leg is a challenge no doubt, but to get this move into your glutes you need to keep the pelvis from drooping.
Start by placing your right foot against the inside of your left leg—at any height that works for you (ankle, calf, thigh, etc.). If you don’t have the balance for this move yet, standing against a wall for support will let you work on your glutes regardless.
If the right, floating side of the pelvis sinks towards the floor, you’re not contracting your left butt muscles as much as you could. Scooting your left hip to the right (moving your pelvis toward the midline) while pushing your standing foot down more will level the pelvis out and get the butt fires going.
Do this one on each side multiple times today, seeing how close you can get to a minute-long hold, constantly checking to make sure you’re not dropping your standing hip outward. P.S. Learning to find your butt muscles can be tough at first, but once you do, bring them into all your single-leg balance moves—including walking. Once they’re strong, they make all other movements easier.
Click the image to play the video!
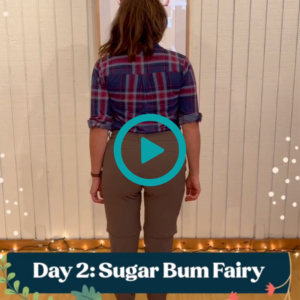
Day 2: Sugar Bum Fairy
Today the glutes will help us fly like a fairy, with delicate wings and buns of steel.
Stand unshod or in flat shoes in front of a wall (or counter or chair back) and place your hands on it.
With your hands still touching the wall, walk back as you lower your torso and straighten and lift your right leg so all your weight is on the left.
Keeping the left leg straight (only bend slightly if your joint hyperextends), shift your weight back over your heel. The wall is there to help—use your hands on the wall to help you find the position.
Just as in yesterday’s exercise, the way you hold your leg and pelvis determines if you’re using more or less of the glutes because #alignmentmatters. Hug the standing leg toward the midline, which will help you with strength and balance.
MOST IMPORTANTLY, check your floating hip. It has a tendency to lift in this move, which turns the glutes off. To turn the glutes on, lower that hip until the pelvis is level.
A note on RANGES OF MOTION: Don’t worry about how high you lift the back leg. You can get into the glutes with any amount of lift of the back leg; it’s all about how you’re using the standing leg.
If your hamstrings are tight, you don’t have to bring your torso so far forward.
To make it more work for the glutes, use the wall less. You might still lightly touch it for balance, but the more you’re leaning on it, the less the back of the leg has to do. See for yourself by trying to take your hands off for a few seconds.
Take a crack at it and let me know how it goes! Also, it pairs really well with yesterday’s move, so try them both together. #fairystrongbutt
Click the image to play the video!
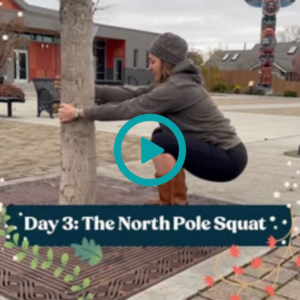
Day 3: The North Pole Squat
Today we are taking our moves to the (North) pole, which you can use to support you in an exploratory squat.
Key to finding your glutes is learning to adjust your pelvis. The more mobile the pelvis is (which really means how mobile the hips and lower back are) the more you can get your butt working during the “up” phase of a squat.
Find a pole, tree, or door jam (anything that can support you hanging onto it) and hold on while you step back and sink into a squat. Keep moving back until your arms are long and your torso is pulled forward. You’ll probably need to adjust your feet a few times. If your knees or hips aren’t down with a squat, then sit in a chair (or better yet, any seat that’s lower than a chair—an ottoman, foot stool, etc.) while leaning forward and untucking your pelvis to deepen your hip flexion.
Practice the difference between tucking and untucking, and see how this moves your knees forward and back. When the knees go forward this places a greater load on the quads, and backing the knees up places a greater load on the glutes. There’s a need for strength in both, but this is a butt exercise advent so BACK IT UP TO GET BACK. Once you’re low, focus on stretching your hips with the knees back (pelvis untucked) and you can also shift side to side as you hang out down there. If you want more, you can play around with supporting your own weight more with a knees-back position while using the pole less. Pair this move with the exercises from Day 1 and 2 to get the buns toasty.
Click the image to play the video!
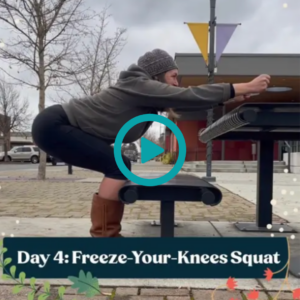
Day 4: Freeze-Your-Knees Squat
Being able to use the fronts and backs of your legs to get up and down is essential, but we’re often practiced in using one side more than the other.
Today’s move concentrates the work on the glutes because #buttfortheholidays.
Set yourself up with a chair seat or wall (or whatever) a couple inches in front of your knees, so as you squat down, your hips HAVE to move back into the “getcher glutes” range.
As you lower down, keep the knees from pressing forward, working on the untucking/deepening of hip flexion you practiced yesterday. Let your torso come forward and counterbalance with your arms to get the hips as far back as you can.
There’s no particular depth we’re after (and the chair/wall/etc. will prevent most from dropping down deeply)—this is an exercise in exploring more movement behind you. You might find your knees wanting to push forward right off the bat, and discover your glutes without having to sit back very far at all.
Click the image to play the video!
Day 5: All I Want FOUR Christmas Is My Two Butt Cheeks
We’re back into the lateral glutes (and piriformis or is that piriFOURmas) with today’s FIGURE 4 stretch.
You can do this move while sitting in a chair, or while standing as demonstrated, which gets you not only the stretch on the crossed over leg, but the glute work in the standing leg too. If you want to try it standing but want additional balance support, do it near a wall or chair to hold on to. Pick the version that suits you best.
From standing (or sitting), cross the right ankle over the left knee and sit your hips back (or lean forward if you’re sitting). Add these elements from previous exercises:
1. Tip the top of the pelvis forward to deepen hip flexion.
If you’re standing:
2. Hug the standing hip inward before crossing the leg over.
3. “Freeze the knee” of the standing leg as much as you can and think “sit back.”
Do this move a few times on each side, switching between legs each round, working to hold up to a minute.
Click the image to play the video!

Day 6: All The Single Leggies
Single-legged “butt squats” are a good part two to a standing Figure 4. Once you’ve stretched the glutes around the hip, it’s time to put them to good use.
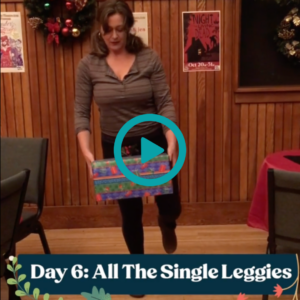
Grab something to hold. The larger it is the easier, as you don’t have to lower down as far. And the heavier it is, the more your glutes have to work.
Begin standing on your left leg with your item held in front of you. Pull the hip in towards the midline (you know how by now, yes?) to engage the lateral hips to keep your pelvis level.
Then, start to sit back as you do in a squat, calling on two other movements you’ve been practicing to help keep this move in your glutes: tilt the pelvis forward to deepen your hip flexion (opposite of a pelvic tuck) and FREEZE THE KNEE (back the butt up) as best you can, while lowering the item to the ground.
Set the item down, and stand back up without it, touching down only as necessary. The less often you touch down, the more the glutes on your standing leg have to keep working.
Then, repeat your squat to get you down to your item and pick it up again, trying to keep balance as you stand back up (still thinking about keeping the squat back in your booty).
How many of these can you do in a row? Four? Eight? Twelve? Once you find what tires out your left side, switch and do a set on the right leg. Repeat the series two or three times, doing a Figure Four (and all the other moves too? Yes? Maybe?) in between.
Click the image to play the video!
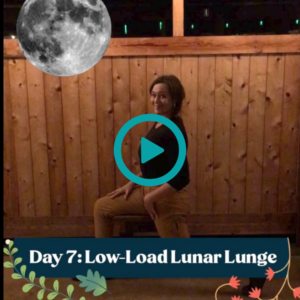
Day 7: Low-Load Lunar Lunge
Are you on the edge of your seat, waiting for the next exercise? Well GOOD, because that’s exactly where you need to be!
To get you FULL MOON ready, we’re moving on to lunges. This low-load lunge takes the weight off the legs (and the knees!) so you can focus on preparing the hips for the extension they need.
Turn sideways to your chair and scoot to the very edge so only half of your butt is on the seat. Reach your free-floating leg back (bent knee is ok) and then use your toes on the floor to work your leg back even further.
Once the leg is back, tuck your tail under (posterior tilt) and relax your chest to focus the stretch on the parts that resist the leg going back: the iliacus, rectus femoris, and the psoas major.
Hold for a holiday minute (playing with how your pelvic tilt can create more or less tension) and then swivel to stretch the other side.
Click the image to play the video!
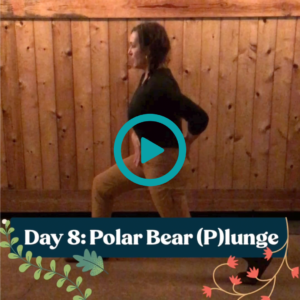
Day 8: The Polar Bear (P)lunge
Who’s ready to plunge into some lunges? Today’s exercise is the same shape as yesterday’s move, only you’re going to load the lunge (have the shape carry your body weight) while also moving through a greater range of motion.
From standing, step way back with your left leg. Make sure both feet are pointing forward; it’s ok to be up on the toes of the back leg.
Same as yesterday’s move: tuck your tail under as much as you can and stack your ribcage over the pelvis (make sure it’s not out in front).
Lower down—maybe until the back knee touches the ground or perhaps part way down (pick a depth, even if it’s a small one, that works for you)—then rise back up to the starting position. Check that your pelvis hasn’t tipped forward or your chest moved out front. Readjust if needed, and repeat, repeat, repeat.
Watch your front knee to make sure it’s not moving forward and back during the lunge (think “freeze the knee”). If it is moving forward and back, make sure you’re not avoiding a bend in the back knee. Play with the distance between the front and back leg to see if that helps.
Find the right number of reps for you by watching your form. When your torso starts leaning forward, you’re getting wobbly, or your lunge is too tired to plunge, switch to the other side!
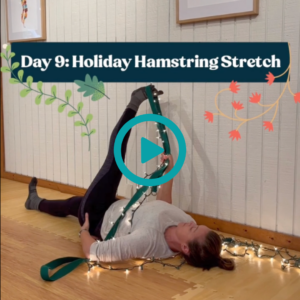
Day 9: Holiday HAMstring Stretch
Who’s having HAMS this holiday season? YOU ARE!
This move is all about tenderizing the lateral glutes on the outside of the hip for tomorrow’s strength exercise but it also gets the rest of the leg at the same time, including the hamstrings.
To start, lie on your back and place a strap around the ball of your left foot and straighten both legs.
Here’s what you need to watch for:
1. The back of the thigh that’s on the ground needs to make contact with the ground (it’s often a tucked pelvis that is causing that thigh to hover a few inches above the ground). Untuck the pelvis and lower the stretching leg until some spot on that lower leg connects.
2. The toes of the strapped foot need to stay pulled down toward you the entire time (no toe-pointing). If that’s too much stretch, lower the leg.
3. Keep the knee on the stretching leg straight. If that’s too much stretch, lower the leg until it can straighten.
Once you’re set up, bring the leg across the midline of the body. Keep both butt cheeks on the floor (the hip of the stretching leg will want to lift up to reduce the stretch. Does that “light up” the outside of the stretching leg? Hold there as you can, gently moving back out, and back in to the stretch
Bring the leg back up and switch legs. Repeat the entire sequence again and feel free to tell yourself, “That’s a nice HAM!”
Day 10: Not-So-Knotty List
Who has knotty hips? YOU JUST MADE THE LIST!
Today’s Pelvic List both lengthens and strengthens the glutes on the outside of the thigh (no, they’re not all behind you). This is such a crucial and often neglected part of your booty, so let’s make it burn like a Yule log.
Standing against a wall, step up onto a block or thick book with your right leg, (I used two blocks here because my pelvis is wide and drops far—the narrower the hips, the less they’ll drop, so one block or thick book is fine.) You can also do this exercise without anything underfoot, you just won’t drop down and get the lengthening part of the movement.
Let the floating leg drop, then push the standing leg down into the block to pick the floating hip back up. Repeat, repeat, repeat. The pelvis will “list” to one side (like a boat). Focus on using the standing leg’s hip muscles to lift and lower; don’t use your lower back.
Alignment checks that will help you STAND BY YOUR HAM:
-A straight foot on the block
-Keep the knees straight (neither knee bends during this move)
-Keep the butt against the wall
-Keep the ribcage against the wall
Your hips will heat up and probably fatigue quickly. Try for 5, 10, or 15 reps, depending on how well you can hold the form. Switch sides and go again! Then do another set on both sides, because you know who’s watching those nice hips.
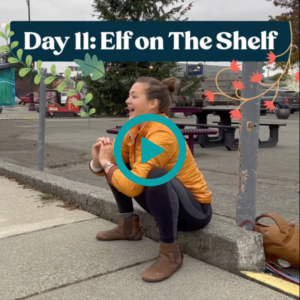
Day 11: Elf On The Shelf
I Spy today’s exercise! Today we’ll be perching, just like that little elf from the North Pole, on something lower than your usual chair: a stool, yoga block, curb, stair step, etc.
This move is to prepare the inner thighs for tomorrow’s strength move.
Once you’re resting on the edge of your seat, open your feet and knees wide and untuck your tail. The lower you are to the ground, the deeper your hip flexion, and the harder this movement may be. If your pelvis doesn’t budge, try perching on something a little higher.
Use your arms to press your knees open and stretch the inner thighs.
You can fidget in this position, playing with pelvis and knee movements to get some of your hip and pelvis parts moving. This is also a resting position you can use daily if you set up a space in your home or workspace to accommodate it. Spending some time with your hips deeply flexed will increase hip mobility and help with future squatting or just overall knee, hip, and low back care.
P.S. You can also do this move on the edge of a chair of conventional height. It doesn’t go as deep, but it will still move some of these parts!
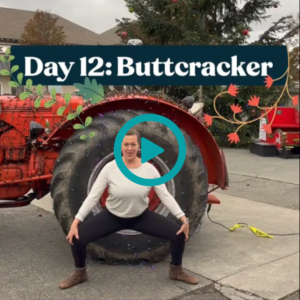
Day 12: The Buttcracker
Time to get crackin’...BUTT crackin’ that is.
Stand with a wide stance, your feet turned out to match the angle of your thighs.
Then plié squat! Bend the knees to lower your pelvis toward the ground (instead of moving forward, the knees travel out the sides) as you keep your torso upright. Go as low as you can, keeping the knees tracking in the same direction as the feet.
Mind the torso parts: keep the ribcage over the pelvis (move it back if it’s out in front) and tuck your tail a bit to help you stay upright.
Hold for a few seconds at the bottom before using the glutes to bring you back up. Repeat, repeat, repeat. To keep things interesting, vary your tempo! Try going slowly, or more quickly, or holding at the bottom for a few seconds. Put on your favorite song and do these to the beat! Buttcracker, SWEET indeed!
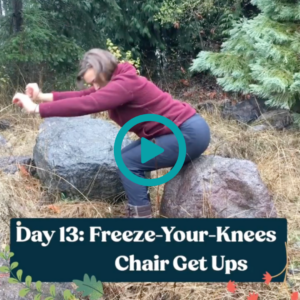
Day 13: Freeze-Your-Knees Chair Get-Ups
Chairs work best for the body when you get out of them frequently. Here’s how to put your booty to work on the get-up portion of sitting.
Take a seat and get your ankles directly beneath the knees, feet pointed forward.
Then, try to stand up without letting your knees travel forward (remember the Freeze-Your-Knees Squat?). There’s nothing wrong with the knees going forward; it just makes your quads do most of the work. You need to get back to get back, knowhatimean?
If you can’t get up at all, sit on something higher (or add a blanket or pillows) to get you to a height where you CAN stand up while keeping knees over ankles.
Leaning and reaching forward is a good counterbalance but watch out for heave-HO HO HOs that are too big. They create downward pressure, so if you’re watching hernias or pelvic floor loads, find a taller seat that keeps your butt working without the momentum.
Lower yourself back down carefully—avoid crash landing. This way you’ll use your butt on the way up and down. Don’t let the knees thaw on the way down! Keep them over the ankles as much as you can.
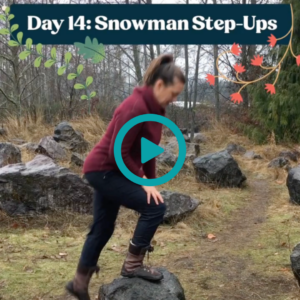
Day 14: Snowman Step-Ups
Today’s move builds on yesterday: step-ups where you keep your front knee from moving forward.
Find your “step”: it can be low, like a yoga block, curb or bottom stair step, or tall like the seat of a kitchen chair.
Place your foot on the step, and adjust your knee over your ankle. Then step up, keeping the knee from sliding forward as you do.
Again, there’s nothing wrong with your knee coming forward during a step-up; it’s just the more the knees go forward, the more you’re using the front of the leg. This advent is focusing on using our glutes. To get in the glutes, keep the knees over the ankle.
You can use the calves of the back leg to help propel you upward, but don’t launch yourself with the back knee. Focus on the butt of the stepping leg for most of your power. If you can’t get up at all, find a lower step until you can, and then slowly increase the step height over time.
After you’re up, control yourself back down (avoid crash-landing). There’s a lot of strength training to be found on the way down too!
It doesn’t take many of these to get the butt burning, so get out the chestnuts and roast them over your heated-up backside.
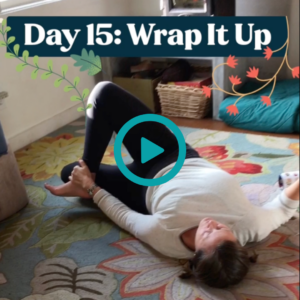
Day 15: Wrap It UP
The glutes are often overly wrapped up with the legs, waist, and lower back. Today’s move will have you exploring muscles above, below, and deep to the glutes. Take care of these for better butt strength.
Start on your back, knees bent with feet flat on the floor. Cross your right ankle over your left knee, as you did for Day 5’s “Number 4 Stretch.” Only the ankle rests above the left knee; don’t let your thighs close together.
Then twist your hips to the left, keeping your shoulders on the floor. See if you can get your right foot all the way to the ground.
Watch your top (right) knee. Don’t let it drop toward you; keep it pressing outward.
Hold for a minute or two! Unwrap yourself and switch to the other side.
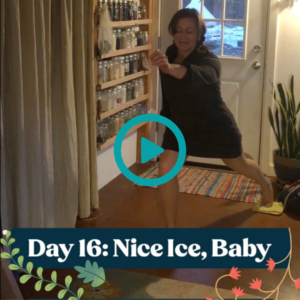
Day 16: Nice Ice, Baby
Today’s move is FUN—you just need a smooth/slick floor and a rag or sock. You can also do this on the carpet with a paper plate under your foot.
Stand on your right leg (and don’t let the left side of the pelvis melt like a marshmallow!) and step on your “skate” with your left foot.
Once you’ve figured out the general motion of pushing back behind you to the right and again to the left, SHOW OFF YOUR APOLO OHNO moves. You’ve been training for this:
Standing leg is strong (hug the thigh in), and freeze the knees, making sure your leg goes back (those lunge stretches will help your range of motion). Use your arms to counterbalance deeper push-offs. When you’re tired, switch legs. Put on your favorite ice skating or roller rink song and do it the entire time, alternating sides as needed. Once you start having fun with a little slip and slide, get creative (and P.S. the littles can have a lot of fun with this move and other twirls on the fake ice.)
If you can’t get any slip, you can also do these with your leg “floating” or not touching the ground. You won’t go as far back, but you’ll definitely get the glutes and it’s a balance challenge too.
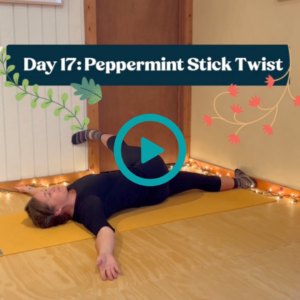
Day 17: Peppermint Stick Twist
Today’s SWEET move for the outside of the hip is all about staying active through the legs, specifically pushing the legs away from you.
You’ll need a corner of a room, with space to lie down. If you don’t have that, then just get the bottom (non-twisting) leg against a wall.
Start on your back with one wall to your left and one wall at your feet. Press your left foot into the base of the wall. This is the most important part of the move—keeping the legs actively reaching away from you. Then, twist your pelvis to bring your right leg to the wall to the left, and press your right foot into that wall.
Turn your torso back toward the floor as much as you can and open your arms into a T shape.
Hang out in that position, pressing both legs into both walls.
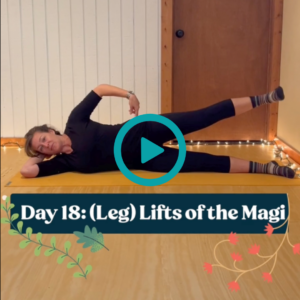
Day 18: (Leg) Lifts of the Magi
Y’all, I come bearing LIFTS!
Leg lifts are a classic move, butt you have to sweat the details if you want to thoroughly get the glutes with this exercise.
Begin on your side with your shoulder, hip, and knee joints all along a line (use the edge of a mat or rug to help you align).
Lift your top leg up and down slowly, turning your thigh so the toes point down toward the floor as much as possible.
Pay attention to your pelvis as you lift the leg. If the hip moves with the leg lifts, you’re not using your hips as much as you’re using the WAIST. How to stabilize the pelvis? Push the top leg away from you while you also lift (this is why we practiced “pushing into the wall” in yesterday’s exercise).
Note: You might find that by holding your pelvis is place, you can’t lift the leg as high. No worries, you’ll be using the butt more.
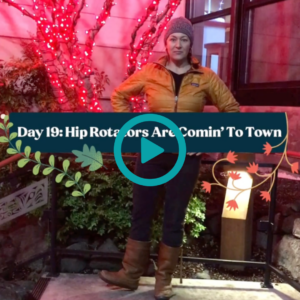
Hip Rotators Are Comin' To Town
One of the lesser appreciated functions of the gluteus maximus is external (outward) rotation of the thigh. Today and tomorrow we’re practicing this motion while standing.
Begin standing on your right leg, pushing that leg down to elevate the left hip (see Day 10 reel for more on that) until your left leg is floating.
Turn your left leg so the kneecap heads out to the side and then turn the thigh back in toward your right leg. Turn back and forth, going as far as you can in each direction.
Keep your pelvis facing forward (don’t let it turn with the leg) to keep the work in your butt. P.S. Both butt cheeks will be working in this move, although they’re doing different movements: one side is working to list, the other side is working to turn the leg.
Repeat on the other leg, and do each side a few times. Keep your weight back over the heel (as you did when listing on the wall) to maximize the work in the standing glute.
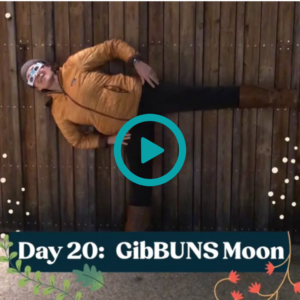
Day 20: GibBUNS Moon
Today we LOAD the external rotation from yesterday with a GibBUNS Moon pose. Get it? This one-legged glute-finder is one of my favorites and requires a wall.
Begin with your right foot turned out, parallel to the wall. Then tip your torso over (use the wall to help hold your body) while lifting the left leg. Keep tipping and lifting until your torso and left leg are parallel to the floor, or as far as your body can get.
THEN, turn the pelvis away from the leg. The pelvic turn is what this move is all about. Don’t let the top hip drop toward the floor.
How long can you hold it? Don’t be half-assed about it; make sure you do both sides and try each side a few times.
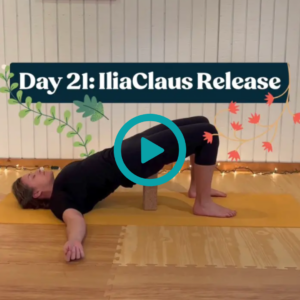
Day 21: IliaClaus Release
On the Northern Hemisphere’s shortest day of the year, let’s talk about a group of muscles that tend to get short: the hip flexors. Glutes depend on hip extension to contract, so the tighter the hips, the weaker the glutes tend to be.
Today’s move is a RELEASE for the iliacus (a hip flexor that runs between the pelvis and thigh). There’s not much to do, just put yourself in this move and let gravity do the work.
Start on your back with your knees bent, feet pelvis-width, and flat on the floor. You’ll need to elevate your hips with a block, bolster, or folded towel under your pelvis.
Position the block so your waistband can tip back toward the floor (place the block lower, in the direction of your tailbone). The pelvis should be supported but able to tip forward and back.
Then, just hang out there and relax. Notice if your ribcage is pushing forward or if your pelvis isn’t relaxing into the space. You might be able to actively flex your muscles to pull your pelvis and spine toward the floor, but that’s not what we want in this case. The point is to wait for your parts to relax down.
Watch the foot position: ankles under knees—feet not too close to you or too far away. Elevating the hips higher creates more potential hip extension, so proceed up once you’ve gotten a release at the lower heights.
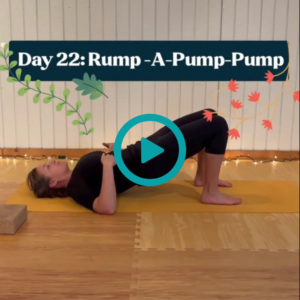
Pa-Rump-A-Pump-Pump
Calling all rumps, LET’S PUMP IT!!
Pelvic thrusts, butt bridges, hip lifts—whatever you call them—affect your buns best when your hip flexors are open (hence yesterday’s move).
You can prepare for these with the iliacus release from yesterday, and once you’re ready, begin on your back, knees bent with feet flat on the ground. Shins should be vertical with your feet Goldilocks-like: not too far away and not too close.
Push your feet down into the floor to lift your hips up toward the ceiling, keeping the ribcage relaxed. No rib thrusting! Initiate the lift from your hips and legs, not by arching your back.
Now, push it. Push it real good. Or pump up the jam. Or Rump-A-Pump-Pump-It. You know what to do.
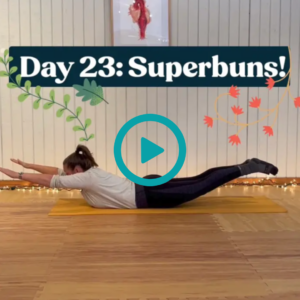
Day 23: Superbuns
It’s a bird. It’s a plane. It’s SUPERBUNS! This hero of glute work is one of my favorites.
Start face down on the floor. Then, lift your legs (you can do one at a time or both) FROM THE HIP. Look for bent knees. Those mean you’re getting your feet up without using your buns.
Also check that the legs aren’t widening away from each other. Keep them together (and notice if you can’t go as high with them closed. That’s a hip flexion tension issue—go back and play with the lunges and iliacus release).
If you feel this in the lower back, then you’re likely getting your legs up by extending the lower back, not the hips. In this case, lower the legs, tuck the pelvis a bit, then lift the legs without letting the pelvis budge. It will be a smaller movement but it will have you on your way to BUNS OF STEEL.
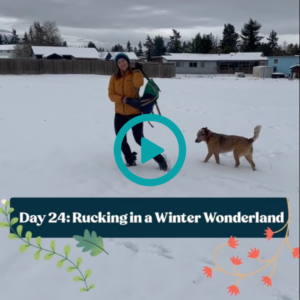
Day 24: Rucking in a Winter Wonderland
This is it, peeps. We’ve survived another exercise advent! Today, I want you to take your butt for a walk. Are you surprised? Surely you’re not surprised.
Walking is an excellent backside exercise, especially after all of this month’s moves addressing hip extension. Take your newly buffed buttocks (and happy hips) out for a stroll and put those muscles to their most rhythmic use.
To punch up the butt use, carry something. The latest buzz in the fitness sector is RUCKING. Rucking is just walking with added weight, i.e. WALK AND CARRY. I’ve been harping on this for years (sorry not sorry) because walking while you carry not only beefs up the leg use, dealing with a load—especially if you #varyyourcarry—brings different muscle groups into the mix. P.S. It’s also an easy way to increase your heart and lung moves without needing to add speed or impact.
You can add weight to your frame by filling a backpack or other bag with wood, books or other items with some mass. Or put your rucking to better use and carry something you actually need to: walk to the grocery store and hoof it home. Bundle up the babies and carry them in arms, or let the youngun’ hop on for a piggyback ride for a mile or more.
As long as you’re pushing off on your legs, your glutes will help you carry the weight. Again, switch up your arm use to mix up your arm and core muscle use.
Today go for a joyful walk (or a ruck) with your loved ones (and yes, that includes YOURSELF), and let this move carry you all into next year!
Wishing you all a booty-ful holiday and a peachy new year!
