I love movement and I love celebrating, thus I always strive to create movement-rich celebrations. For years, I’ve done a movement advent calendar at the end of the year as a thank you to my readers, and as a way of inspiring people to move more in their daily lives. No fancy equipment, just us moving joyfully together during a busy time of year.
There are three ways to follow along this year. Starting December 1st, move along each day by following Nutritious Movement on Instagram or Facebook, or if you're not on social media or are trying to be there less (a decision we wholly support!) you can find each day's move updated daily below! If you're excited for more, check out the exercises from other advents here:
EXERCISE ADVENT 2014: Walking
EXERCISE ADVENT 2015: Upper Body
EXERCISE ADVENT 2016: Core Strength
EXERCISE ADVENT 2017: You DO Know Squat
EXERCISE ADVENT 2018: Get Heavy
EXERCISE ADVENT 2019: Dynamic Home Advent-ure
EXERCISE ADVENT 2020: With a Twist
EXERCISE ADVENT 2022: A BUTT For The Holidays
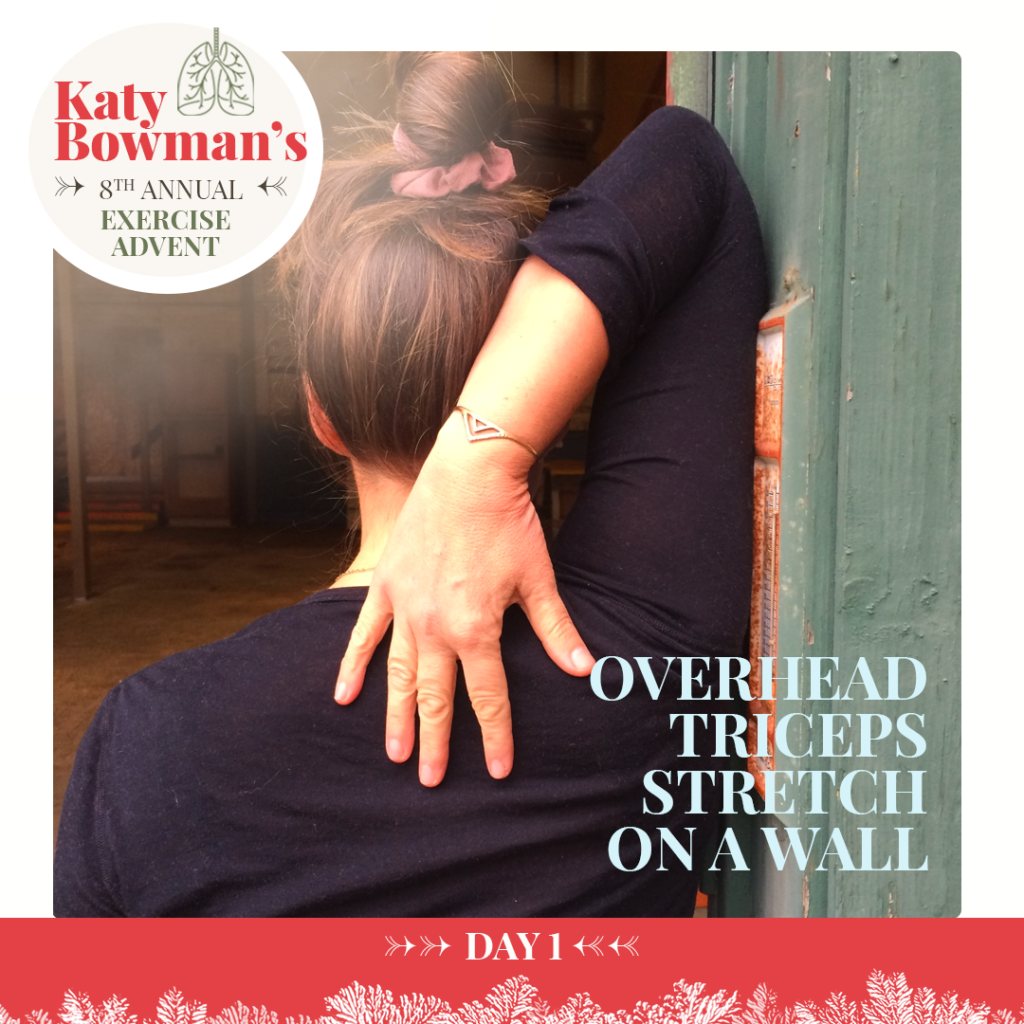
Day 1: Overhead Triceps Stretch On a Wall
We under-appreciate (or perhaps don’t recognize) how limb movement and bigger muscles work synergistically with non-musculoskeletal parts. Said another way, the movement of our lungs and our ability to breathe is impacted by the mobility of the parts that surround our thoracic cavity and lungs. Thus, we begin our journey to breathing well with shoulder movement!
Today’s exercise is a #vintage move taken to a wall, where you can let the wall assist you into a better-aligned version that allows you to relax all other parts.
Reach your right arm up and bend the elbow to touch the neck or lower, to the upper back. Lean into a doorway or wall to help move the arm closer to the body. If your shoulders are very tight and your elbow wants to move forward, use the wall/doorway to help support it moving back.
Hold this move (or work your way up to holding) for twenty slow breaths. Work on relaxing your shoulders, face, other arm, etc.
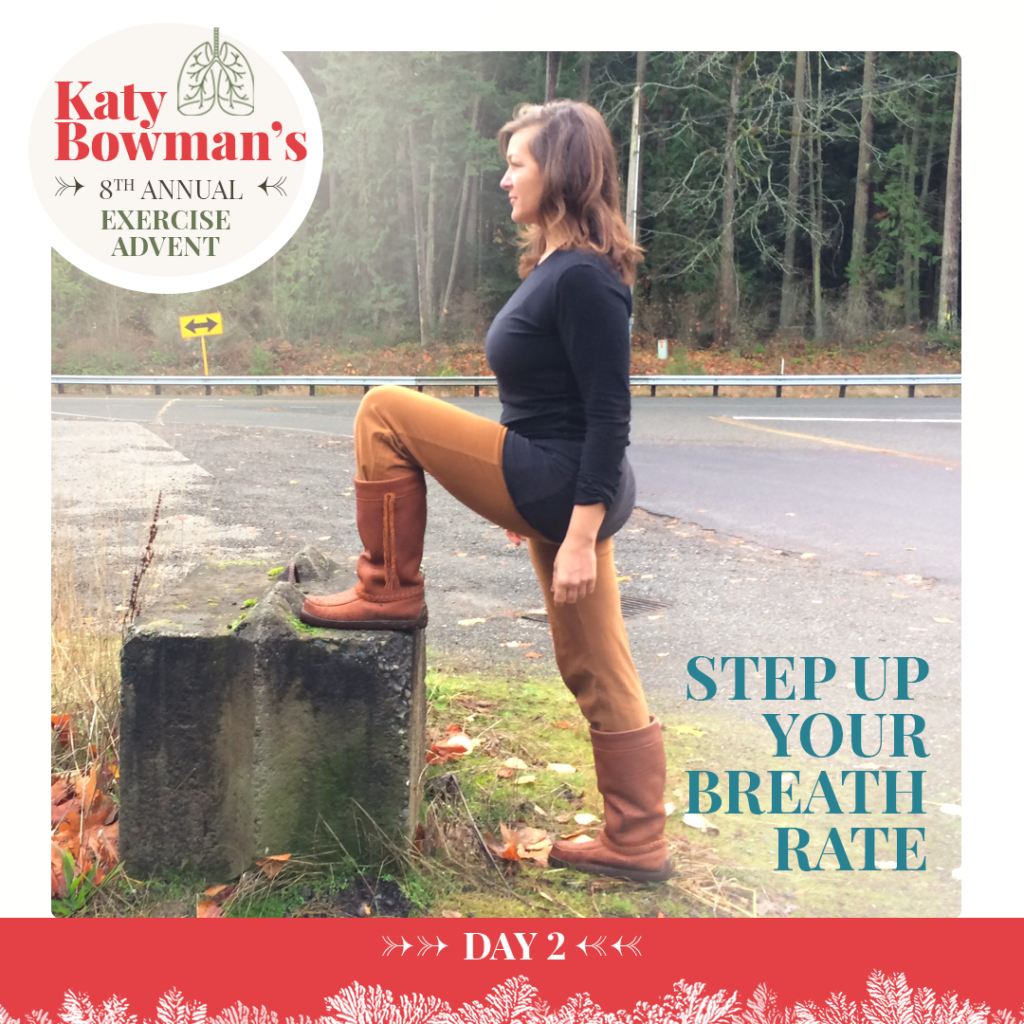
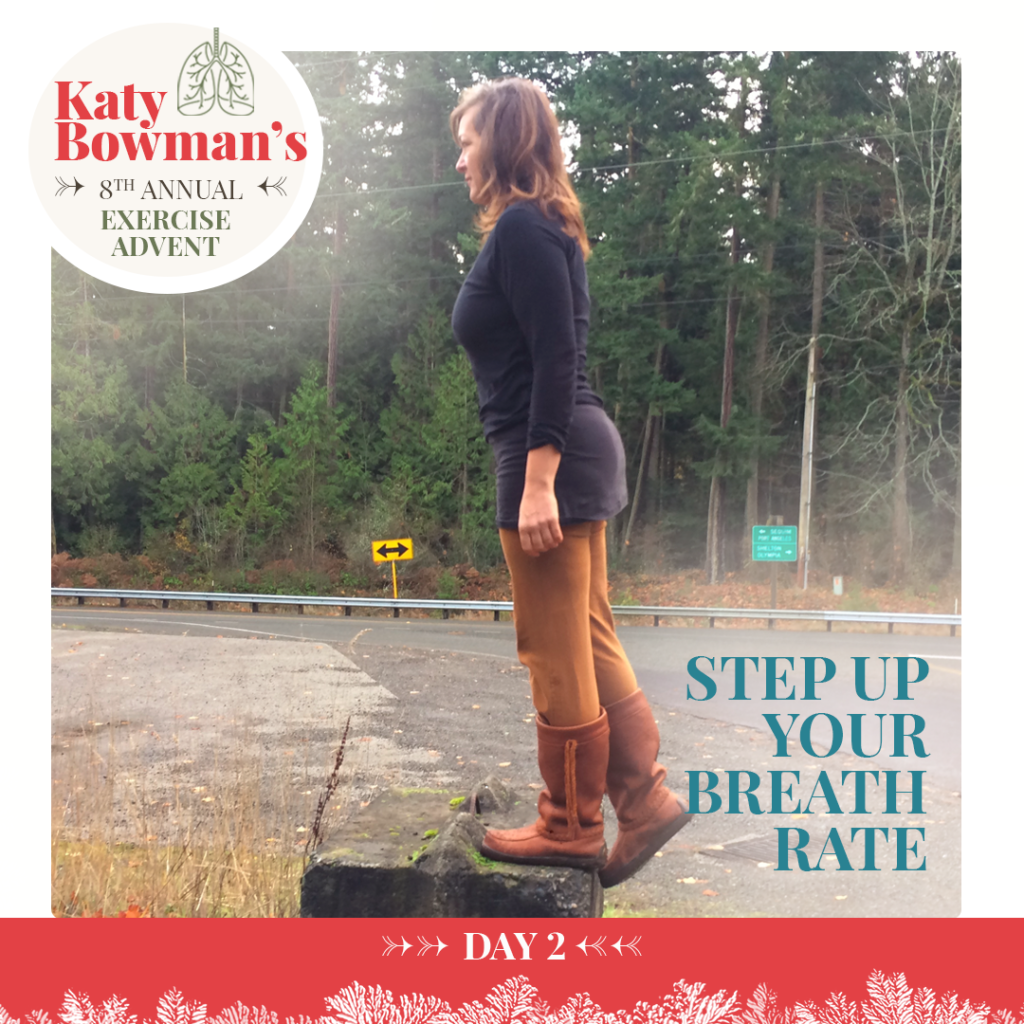
Day 2: Step Up Your Breath Rate
Fundamentally our tissues run on gas (oxygen) and we have a set of levers and pulleys that move to bring gasses in and out of our body. The amount of gas-fuel you need depends on what you’re doing. Moving more means more gas needed; spending more time at rest takes less.
Said another way, the more movement you do with non-breathing parts means more movement for your breathing parts. Not moving much not only creates a weakness/stiffness/sluggishness to the primary parts that get our whole bodies moving, e.g. our limbs and torso, it also leaves us with weaker/stiff/sluggish breathing parts.
The bulk of this month’s moves will be working on those breathing pulleys and levers but even if those parts become more mobile and able to move, it still takes hauling your whole person around more to move the breathing pulleys and levers in a breathing way. DOES THAT MAKE SENSE? Add this Day 2 move to every other advent move so that you’re not only priming the breathing-part pump, you’re going to stimulate the breathing-parts to move as a natural response.
Find something to step up onto. A step or flight of stairs in your home or workplace, a stack of books, or any ledge will do. The higher it is, the more work you’ll be doing, but pick a height where you can control the up and down movement well. Step up continuously for 20 breaths on one leg and then 20 breaths on the other (all in a row or switch legs every or every couple of breaths--you can’t get this wrong!). P.S. You can do yesterday’s move before and after the step-ups and see how they work together!

Day 3: Thoracic Stretch On The Wall
There are hinges between each rib and their corresponding thoracic vertebra. When these hinges get stuck, expanding the ribcage/thoracic cavity gets hard if not impossible.
Our habit of spending a lot of time hunched forward translates into ribs that aren’t able to rotate/lift as much which then goes on to affect how deeply we can breathe. This is a gentle move that starts to reposition our upper back and shoulders as well as move the thoracic vertebrae in a way that frees the ribs.
Stand facing the wall. Reach your arms overhead and place hands on the wall (or other support) and slowly back up until your arms are fully outstretched, lowering your chest through your arms. Shift your weight back into your heels and untuck your pelvis. Bend your knees if tight hamstrings interfere.
Hold this move (or work your way up to holding) for twenty slow breaths. Repeat throughout the day for faster results. P.S. To move even more, do this move, then your step ups (Day 2), then this move again!
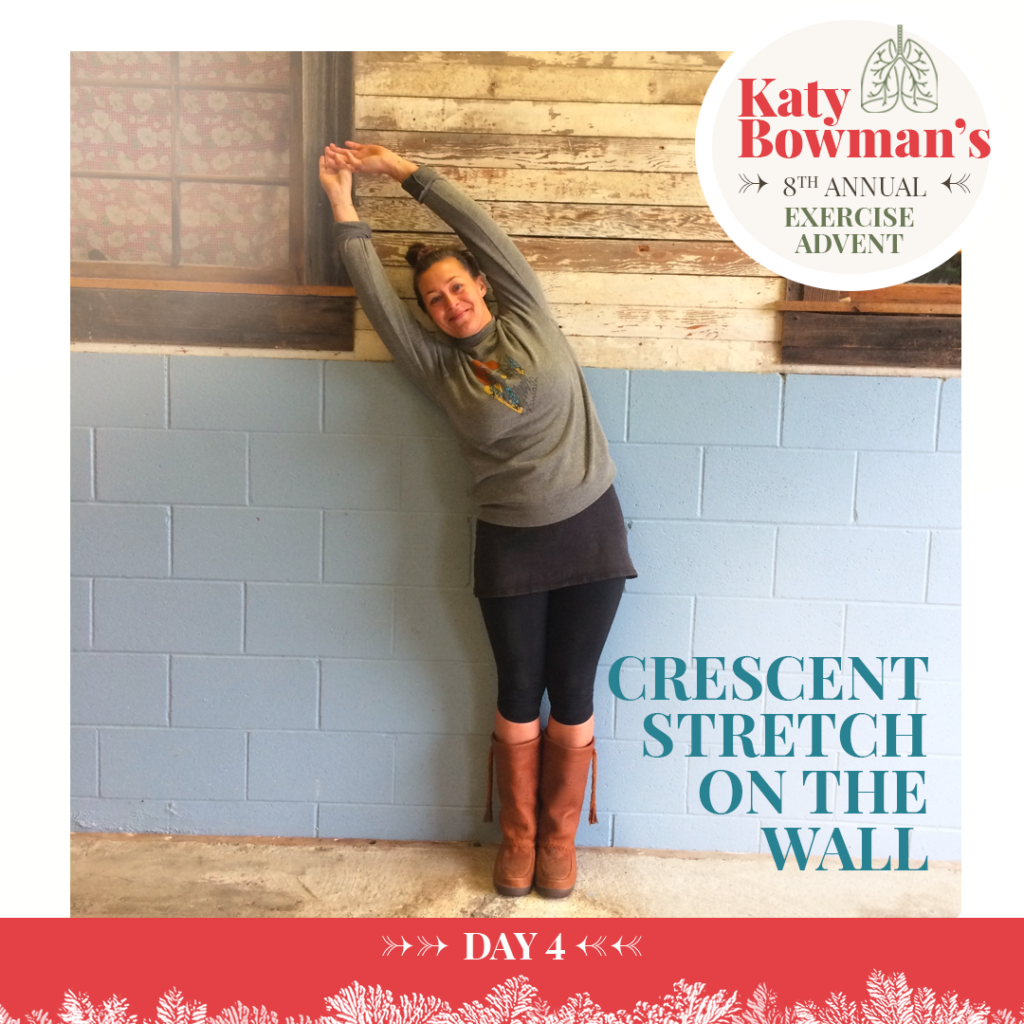
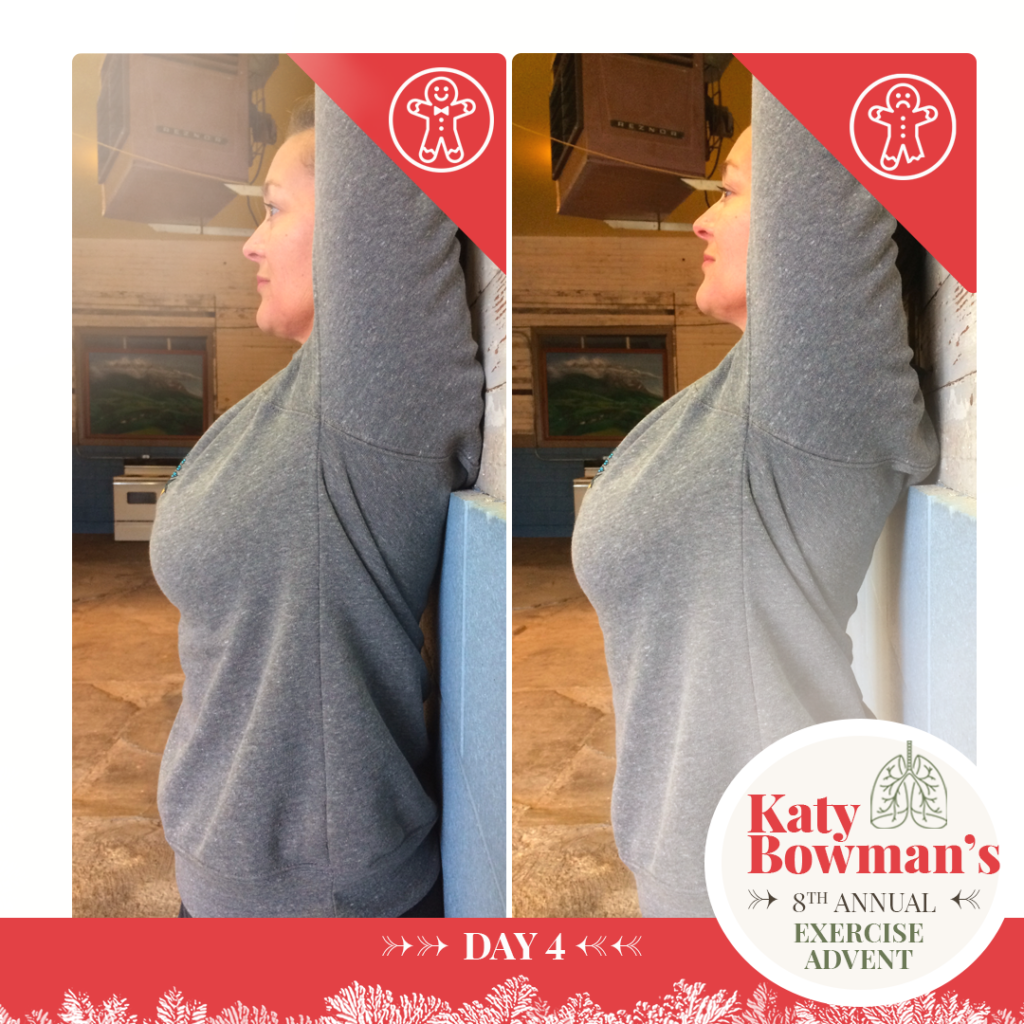
Day 4: Crescent Stretch On The Wall
This can be a waist stretch and it can be an in-between-the-ribs mover too, but you have to get the back of the ribcage to the wall.
Stand with your back against the wall and reach your arms overhead until your wrists touch the wall (you can also reach just one arm). Put the ribcage on the wall if it’s not there already (see slide 2).
Then, bend to the right as you can, keeping your pelvis from shifting to the left. If your shoulders are tight, keeping the arms on the wall can cause the ribs to pop up (and vice versa). If this is the case, modify by allowing the arms to move forward as necessary so you can give the ribcage more movement.
Like the shoulders/core/breathing moves? Check out my book Diastasis Recti: The Whole-Body Solution for Abdominal Weakness and Separation for more moves and explanations.
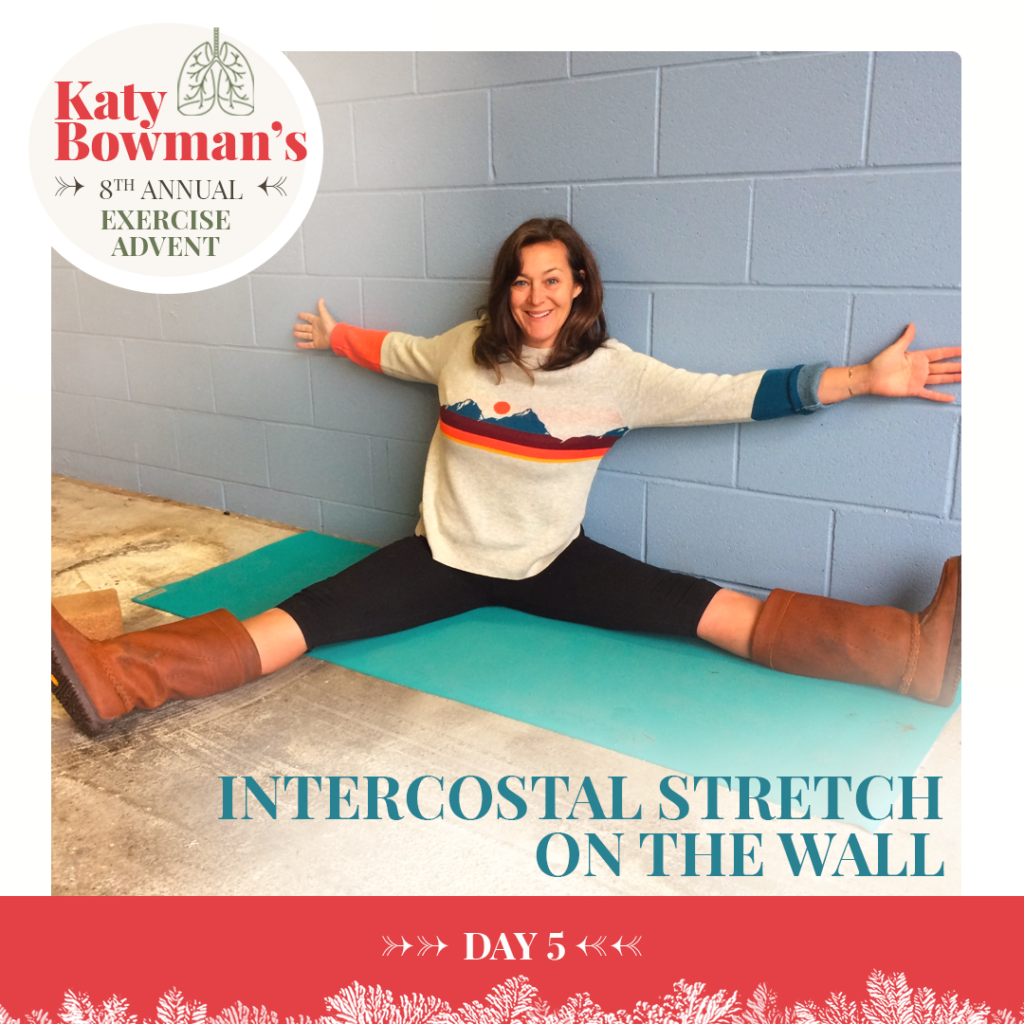
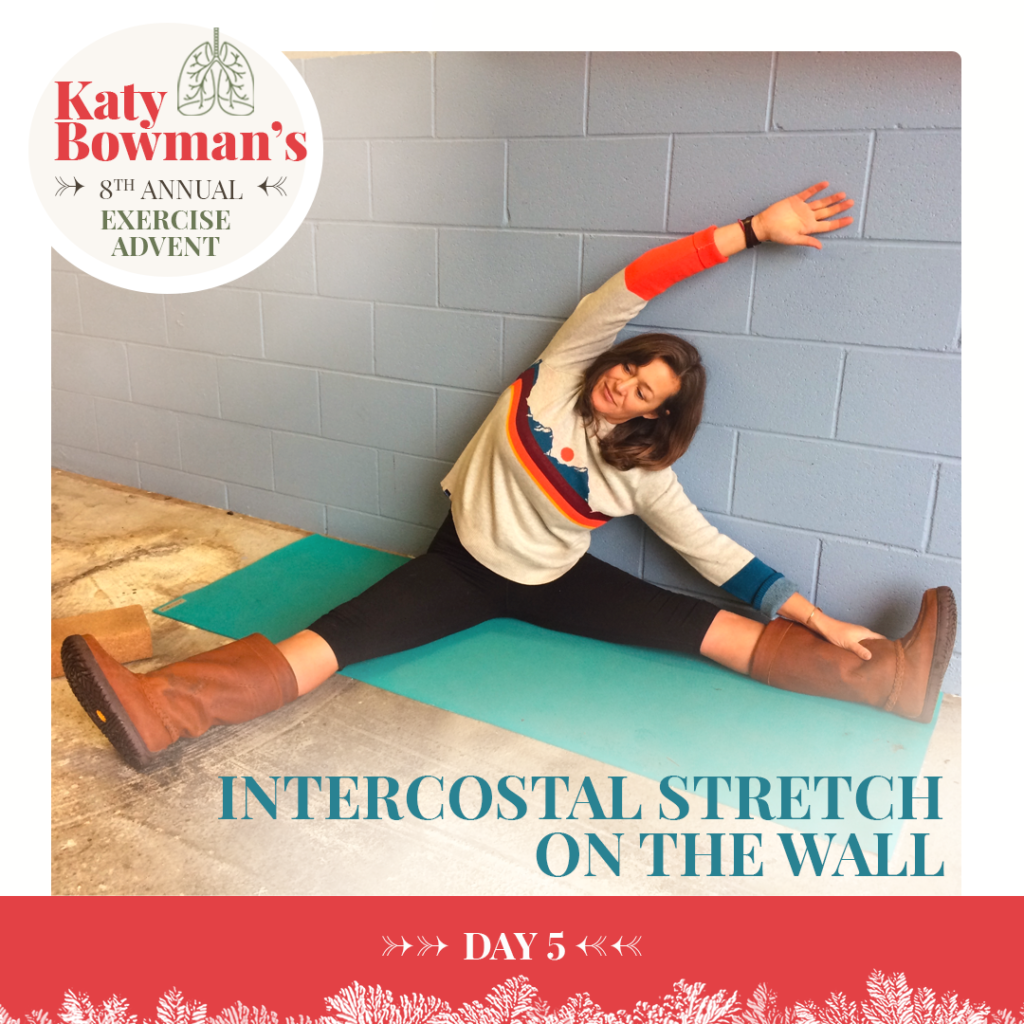
Day 5: Intercostal stretch on the wall
This is a side bend with a twist that pulls on the ribcage (and muscles in between the ribs) even more! Ideally you do this against a wall, but if you don’t have one, adjust accordingly.
Sit with your legs in a V. Tight legs? Sit up on something as you need. Align your V so that your left leg is against a wall.
Then, put your torso and both arms on the wall (this adds the twist!). If your torso can’t twist enough to bring the right arm to the wall, just do it to your ability.
THEN, keeping your arms and torso on the wall, lean the torso and reach the arms toward the left AND BREATHE. The stretch is great, but really pay attention to how your body has to deal with taking a breath in this position.
P.S. Waist mobility and ribcage mobility and breathing are all tangled together. This is why you’ll find shoulder, waist, and ribcage mobility work take center stage in my content for #pelvicfloor and #diastasisrecti stuff (Read Diastasis Recti!). I think these are the most important mechanical contributions with the PF and DR being more a side effect.
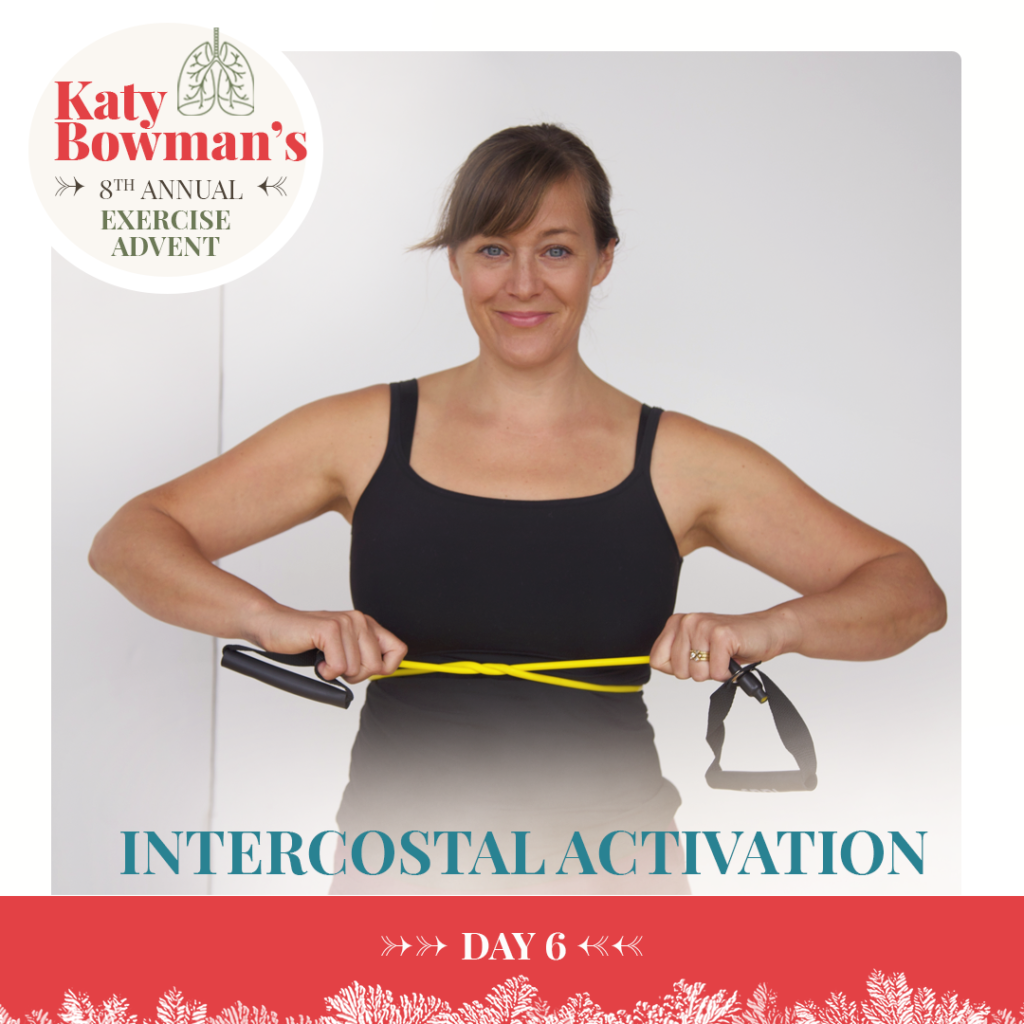
Day 6: Intercostal Activation
The entire ribcage moves as a unit but the individual ribs that make up the rib cage also move on their own: they each rotate.
When the ribs each rotate up individually, the ribcage’s circumference gets bigger. When the ribs twist down, the ribcage gets smaller.
Today’s move is subtle but going forward, you’ll be adding it to all the future moves (and you can go back and add it to the previous exercises too). Today we’re getting our breath by breathing in a way that moves the intercostal muscles (muscles in between each rib).
Seated or standing, firmly tie a resistance band or pair of tights around your rib cage just beneath your chest muscles/breasts. Or, you can put your hands on your waist and slide them up until your hands are up on your ribcage and press on your ribcage gently. Reach the top of your head up toward the ceiling to lengthen the spine.
Inhale slowly and deeply, trying to expand the ribcage into the band or your hands. Keep the shoulders down and relaxed.
Then, exhale as much as you can, trying to bring the ribcage away from the band or your hands (it’s natural for your abdominals to contract in efforts to exhale fully).
Repeat for 20 breaths!
This is another move from my book Diastasis Recti. If you are interested in how our anatomy and movement works to create pressure in the thoracic, abdominal, and pelvic cavities, check it out!
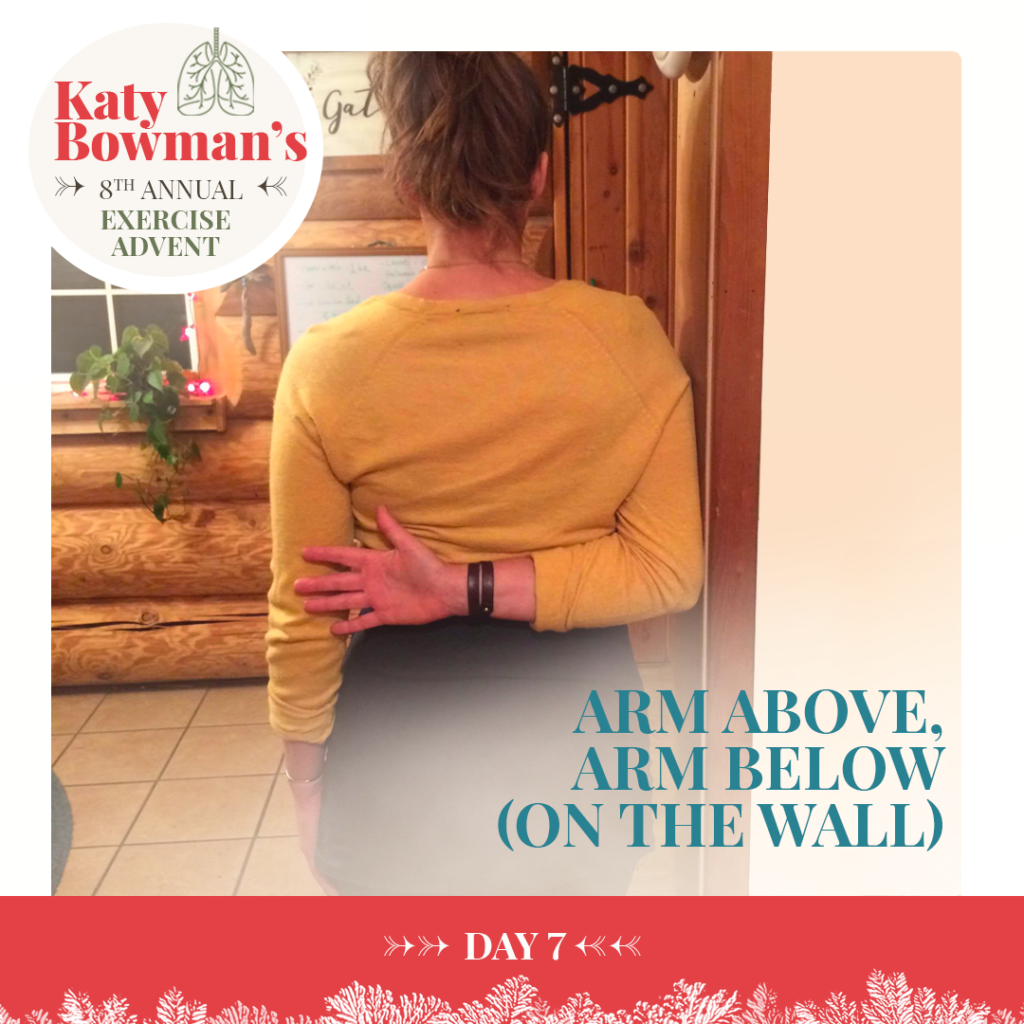
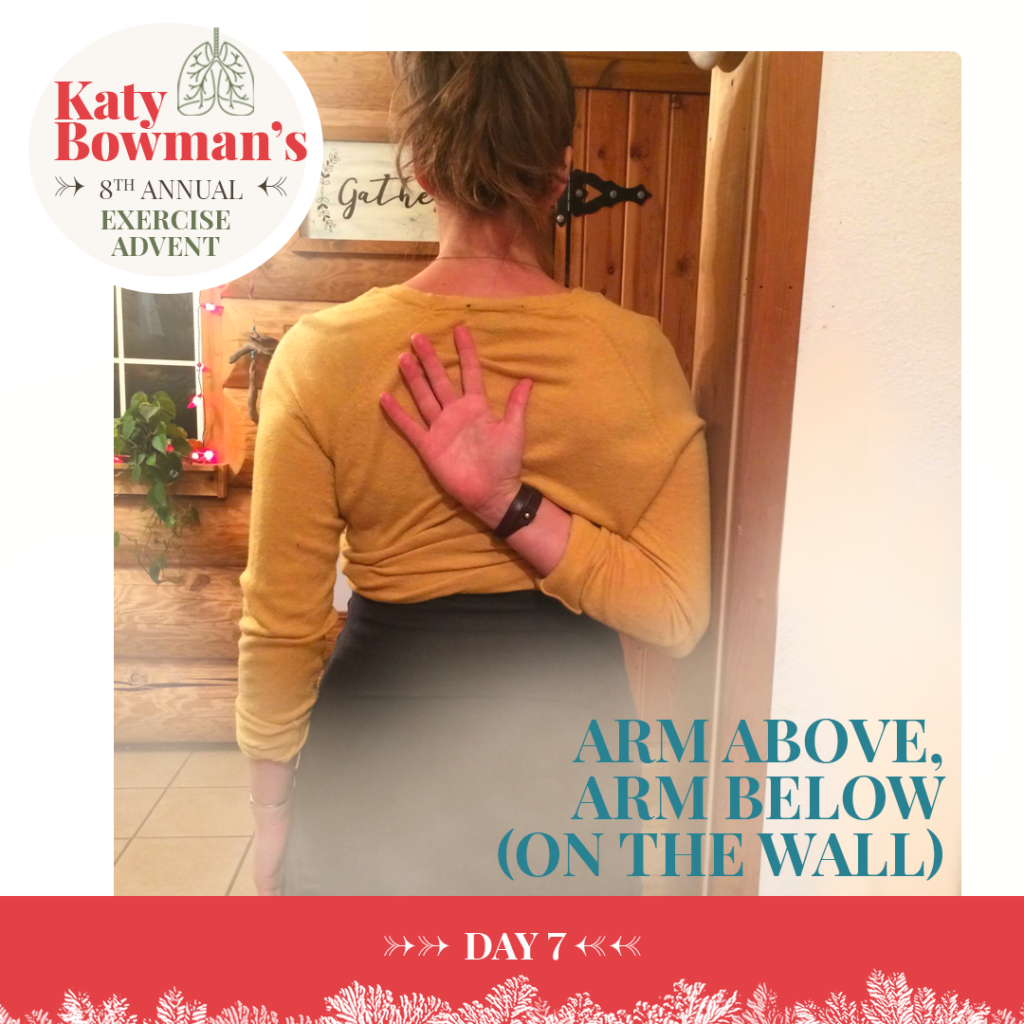
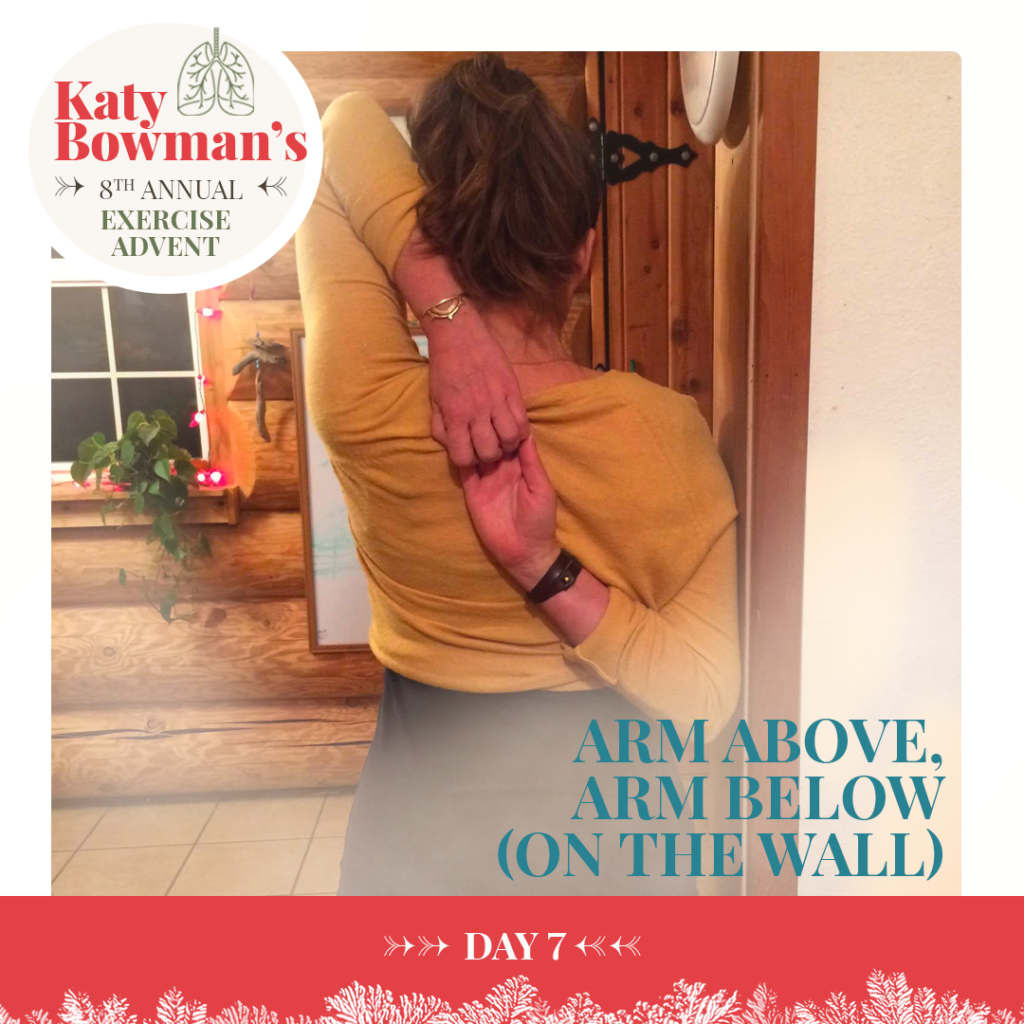
Day 7: Arm Above, Arm Below (On The Wall)
Remember the Day 1 exercise? THIS IS AN UPGRADE!
Reach your right arm behind your back, using a wall to assist as needed. Hang out here for a couple breaths and then as you can, bend the elbow to move the hand up higher.
Reach your left arm up and over (see the move from Day 1), maybe turning to use the wall again, and either grasp hands or use a dish towel, shirt, or strap to connect them.
Hold for 10-20 breaths and then repeat on the other side. What does it feel like taking many slow breaths in this position?
P.S. Yes, you’re shooting for ribs down. If getting the ribs down makes the hands come apart, then just add that strap or towel to reconnect them.
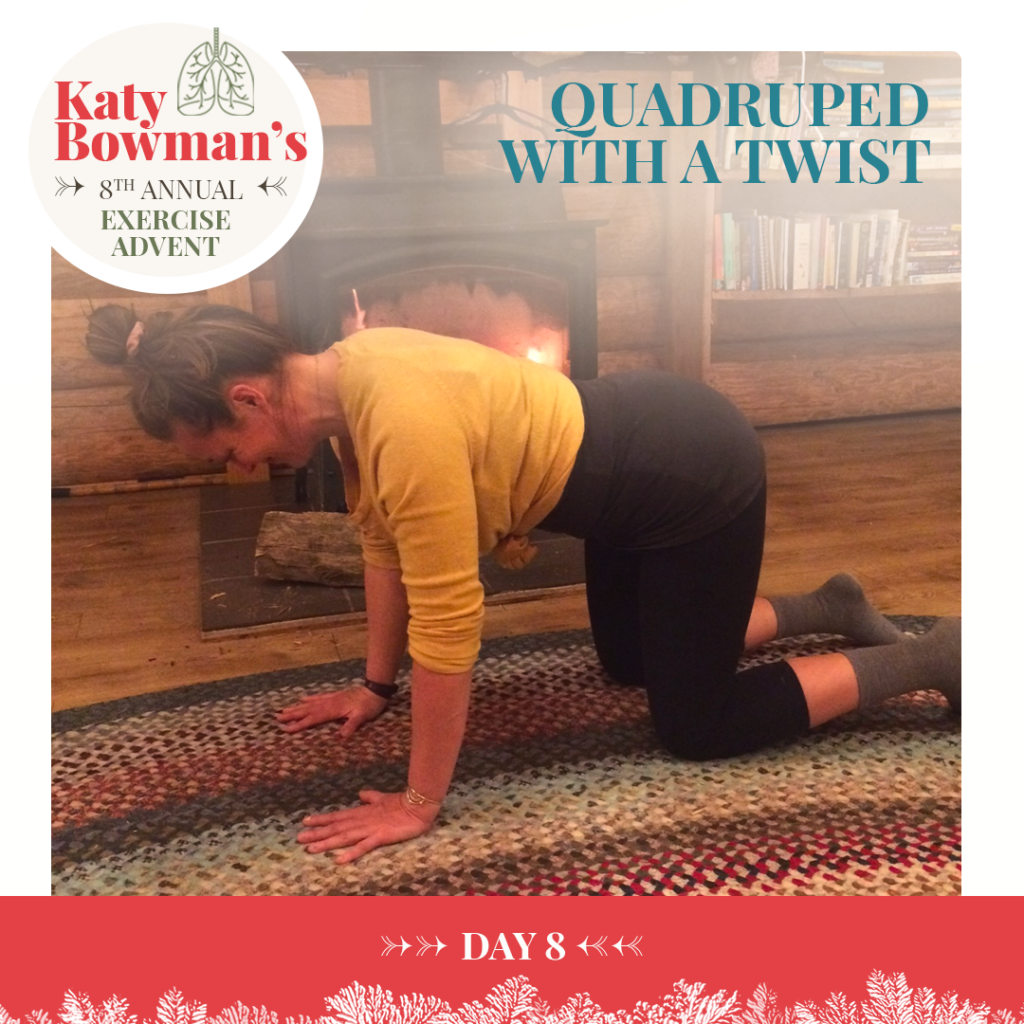
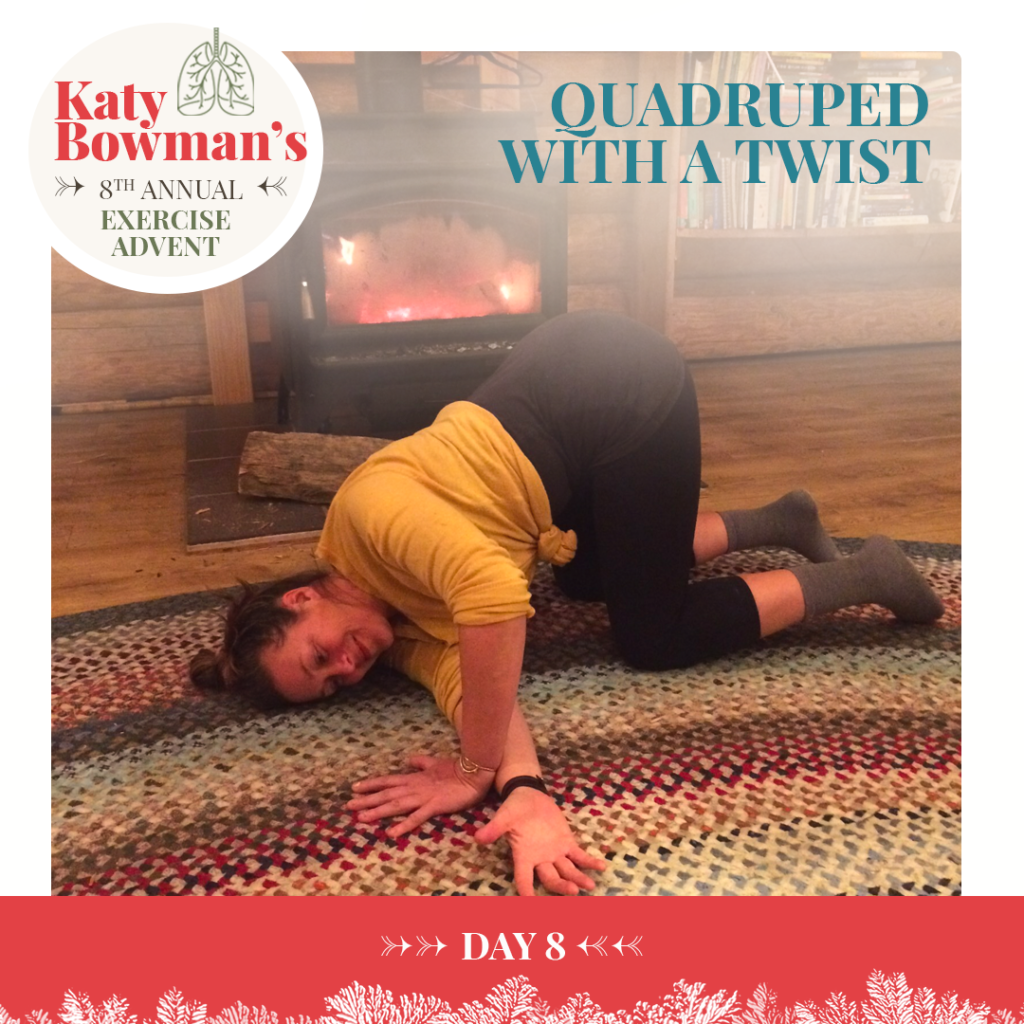
Day 8: Quadruped With A Twist
We are going to start adding more abdominal movements to our breathing moves. We’ll begin with a twist that not only keeps the ribcage moving but gets the waist moving too.
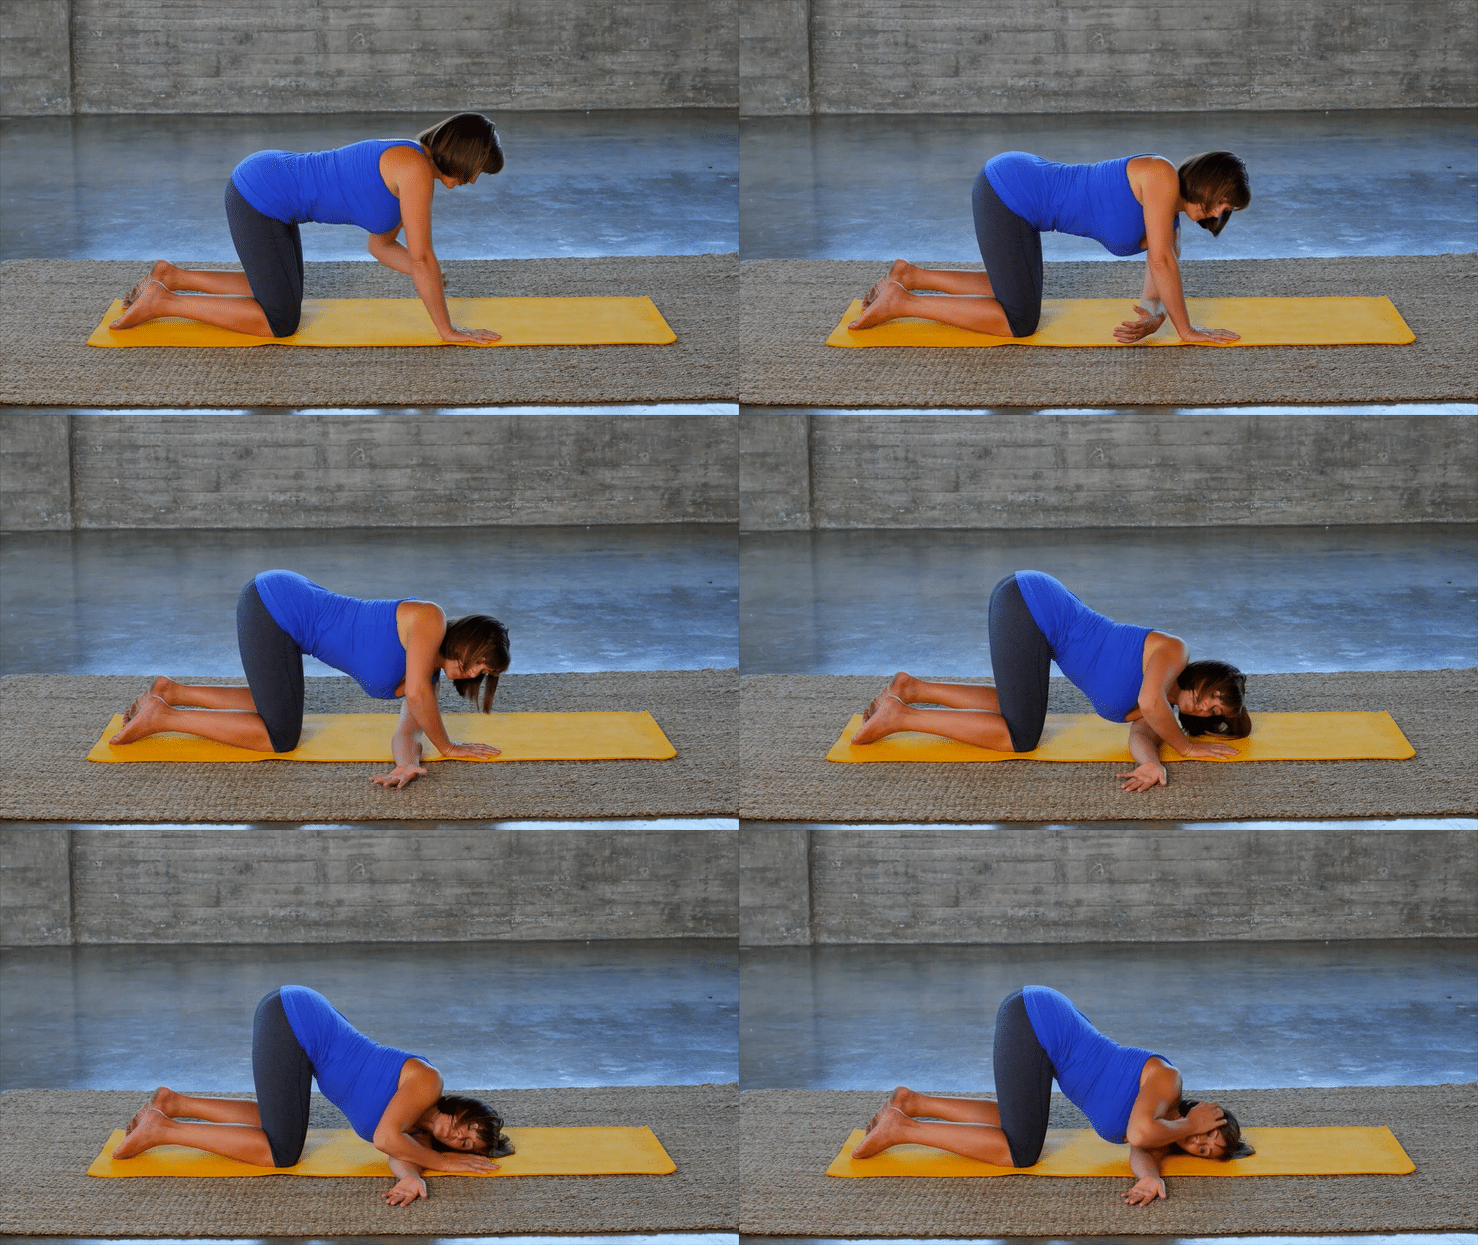
Begin on your hands and knees, placing your hands directly below your shoulders and your knees directly below your hip joints.
Then take your right arm and thread it through the left side until your right shoulder rests on the floor, right between where your right and left wrists used to be.
HIP CHECK: Make sure that the hips are still directly over the knees and that the hips aren’t leaning to the right or left. They should stay in the same position from start to finish.
Hold for 10-20 breaths, noticing how this position affects your breath. Twists take away abdominal breathing options so this position demonstrates how well the individual ribs can move. Just breathing deeply and focusing on rib movement (see Day 6) can increase the mobility in the ribcage. But if this area is very stiff, and breathing too difficult, then reduce the amount you are twisting.
Come out of the move slowly, sit back to center your spine (you can even do step ups in between) and then repeat on the other side.
P.S. Slide 3 is a video of this move from my Healthy Pelvis exercise routine DVD/download!
P.P.S. I GOT THIS SWEATER AT THE GOODWILL AND I AM NOT WEARING ANY BOOTS.
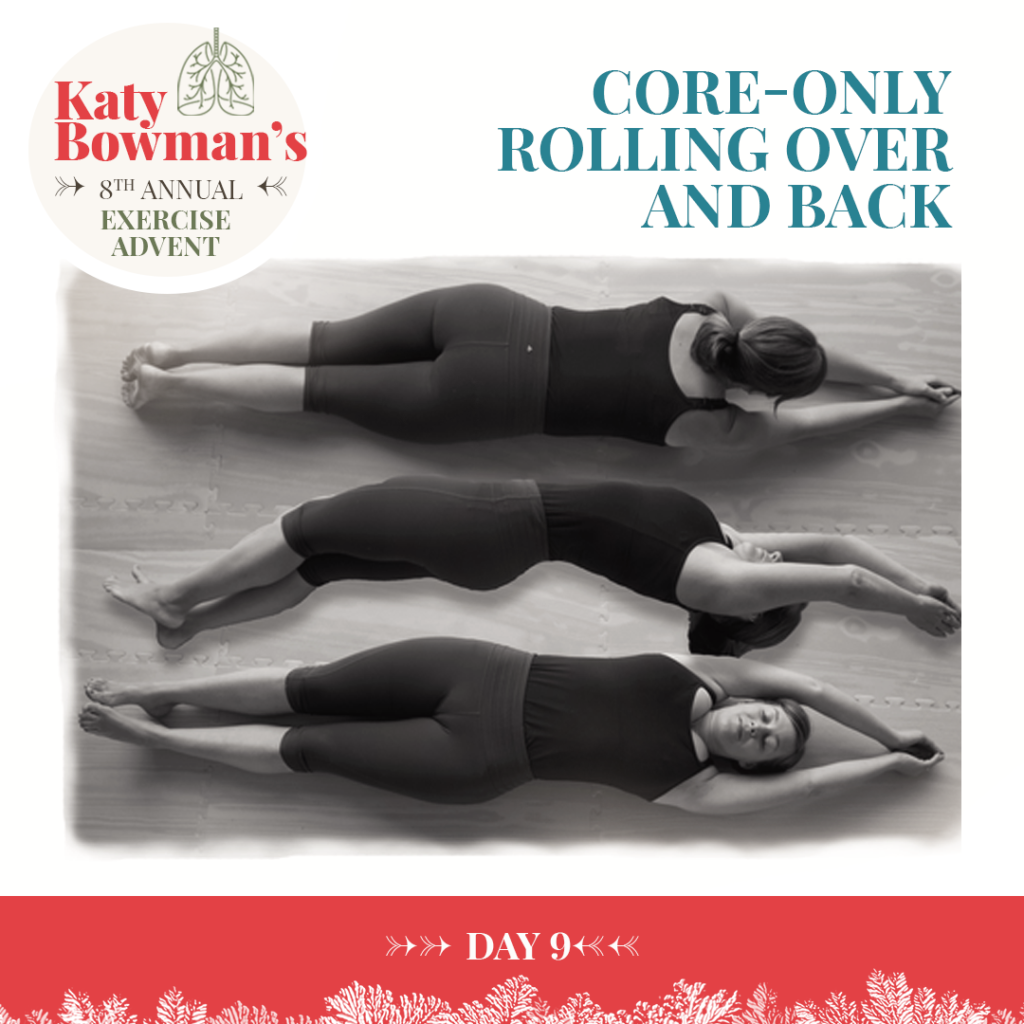
Day 9: Core-Only Rolling Over and Back
We are keeping with the core and using it to help roll us over (and over, and over).
Begin face up, arms overhead. Then roll over until you’re face down and then one more time in that direction until you’re face up again. Then head back in the direction you came from, rolling face down and face up.
There’s a lot of ways to roll, so pay attention to how you initiated the movement. Did you lift an arm or a leg? Try doing it by not lifting your leg to get started, but by pushing a leg into the ground. Twist the pelvis and twist the ribs (i.e. move your waist!).
Repeat this 10-20 times, paying attention to how you’re breathing. Then, you can vacuum your floors like I always want to after doing this move.
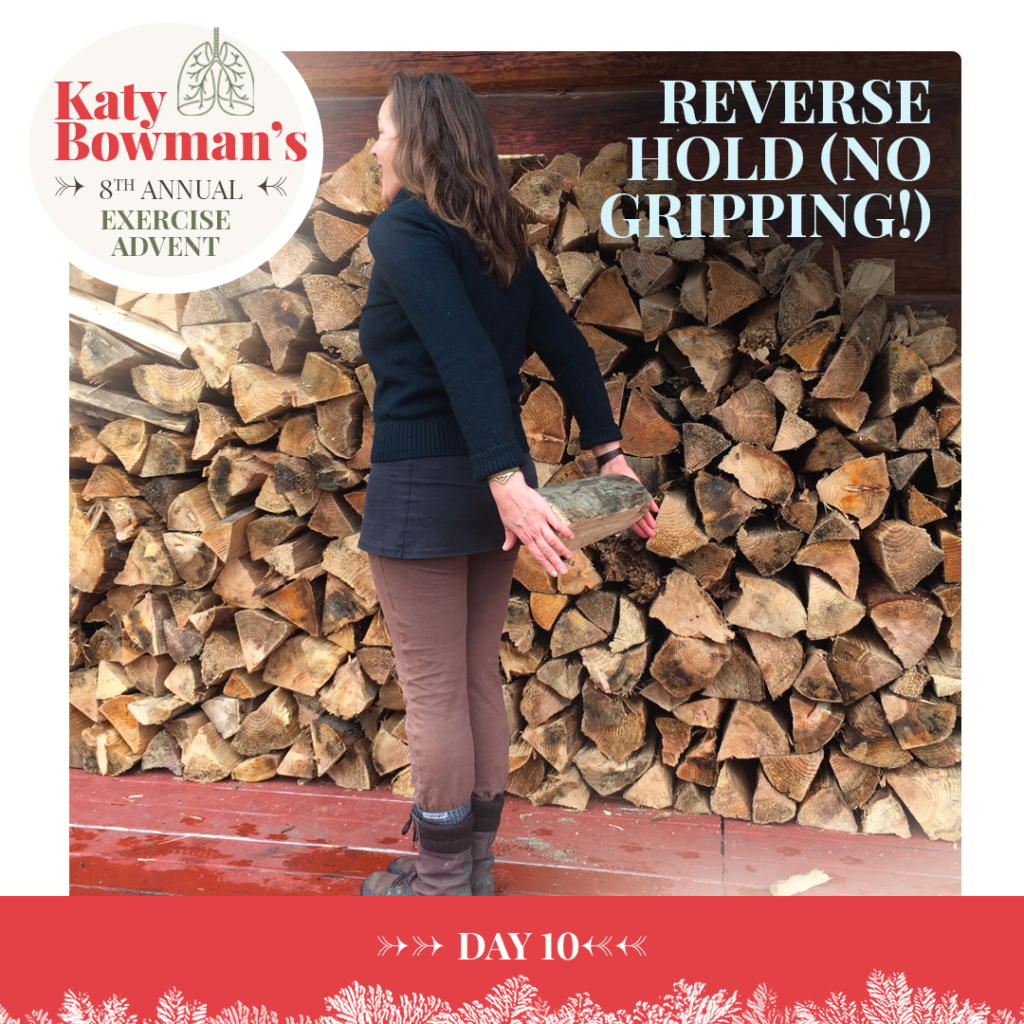
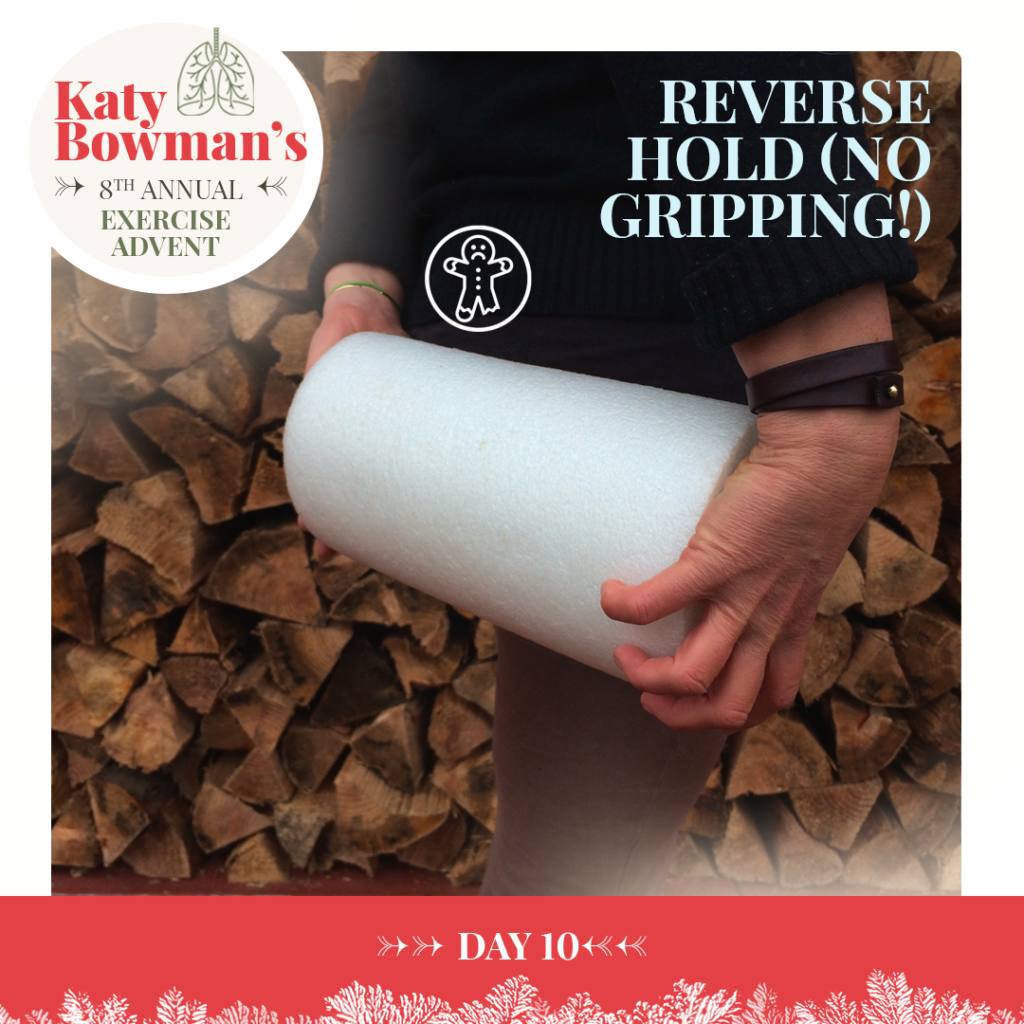
Day 10: Reverse Hold (No Gripping!)
Most of what we do is in front of us and the muscles on the front of the body adapt to how we wear our position most of the time. Today we’re mixing it up, though; I’m giving you something to hold behind you.
I’m using a log because I have a lot of them, as you can see. You could also use your Calf Stretch roller or a yoga block--you just don’t want it to be too short.
Reach your arms behind you and press your palms together to hold the object. Note I said PRESS YOUR PALMS because what you’re going to want to do is grasp the object by curling the fingers (see the second slide). Try not to curl your fingers (which means your hands are taking over for your shoulder muscles) while holding. If you can barely get your arms behind you then don’t worry about grasping for now. Grasp away!
If you’re holding something heavier like a log, your breath rate can elevate because it’s heavy to these muscles behind you that don’t often get to carry much. Try to relax all your non-holding parts and breathe slowly (move those ribs!) 10-20 breaths. Yes, you can try this a few times in a row!
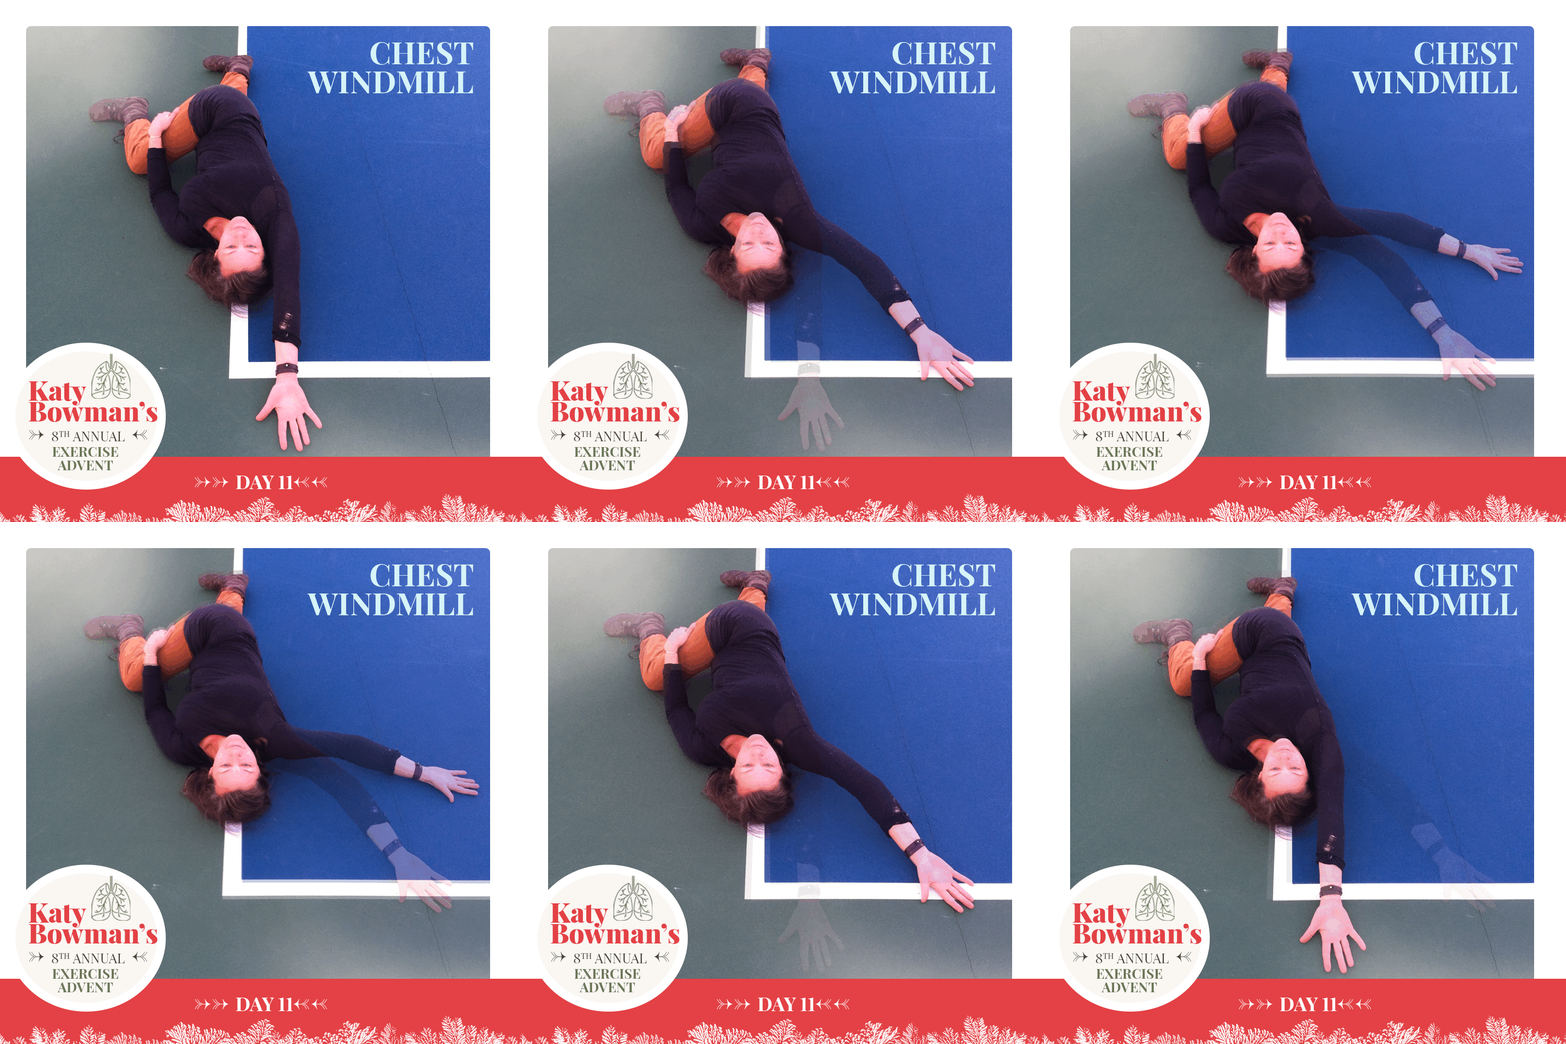
Day 11: Chest Windmill
This is one of my favorite moves, and I enjoyed picking up this photo on the court because I thought the lines just gives it a little extra alignment instruction!
Starting on your back, bring your right knee up over your hip and then roll your entire body to the left—don’t spinal twist, but roll—until your right knee rests on the ground. Ideally the knee stays on the ground throughout this exercise.
Reach your right arm directly overhead until it touches the floor (or reaches the boundary of your tension). Note: If your upper body is tight, then this might be the move you’re working on! Oftentimes arms can’t yet get to the floor overhead.
Keeping your palm facing up, move your arm along the ground to the right, and then back overhead. Trace this arc on the ground (or, if it’s a bit in the air, so be it) for 10-20 deep breaths.
Repeat on the other side.
Extras: Ideally you’re not thrusting your ribs (if your shoulders are too tight for the arm to go overhead, then the tendency will be to arch your back until it gets there). If you are, then prioritize ribs down and let your arc be in the air.
And, if your shoulder is so tight that it can’t reach to the right at all, prop your knee up with a folded towel or two and make this the new place for the knee to stay. If you lose the stretch in your chest/arms, then your knee is too high.
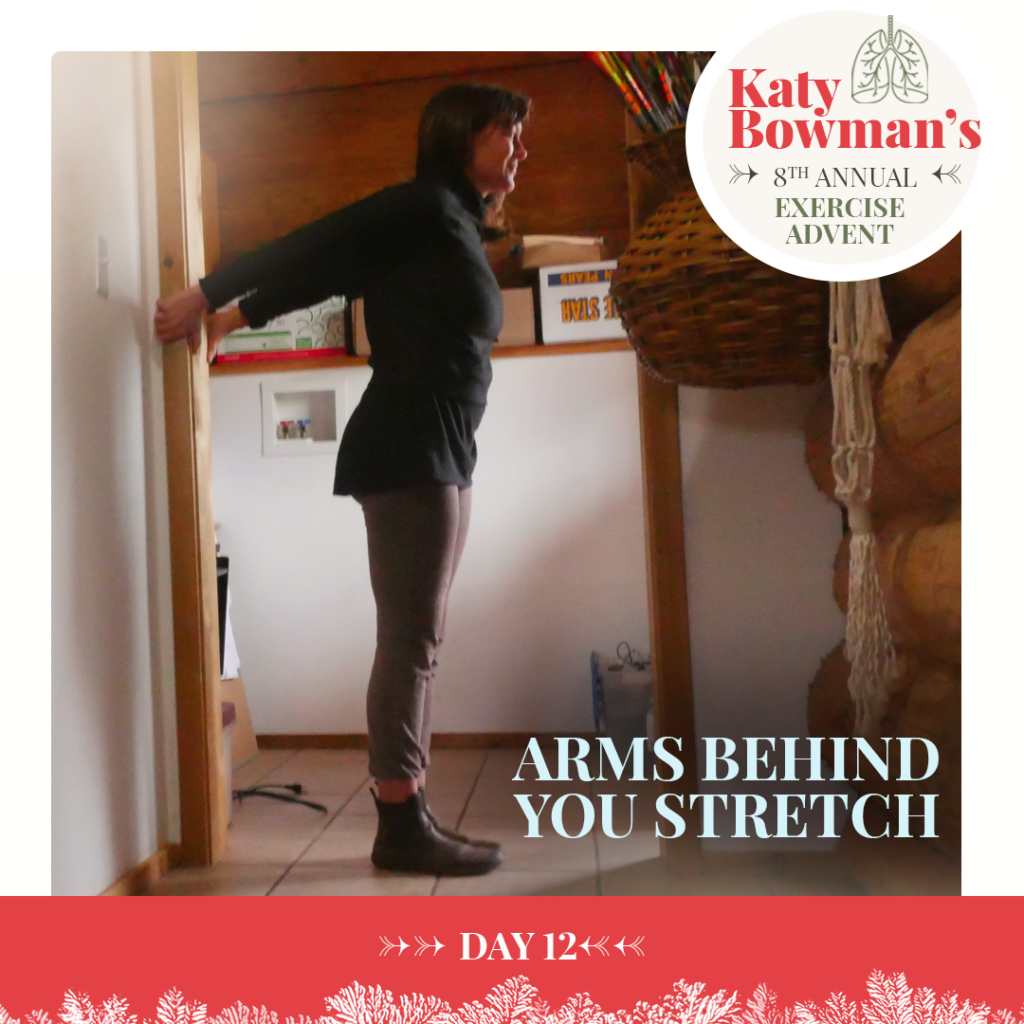
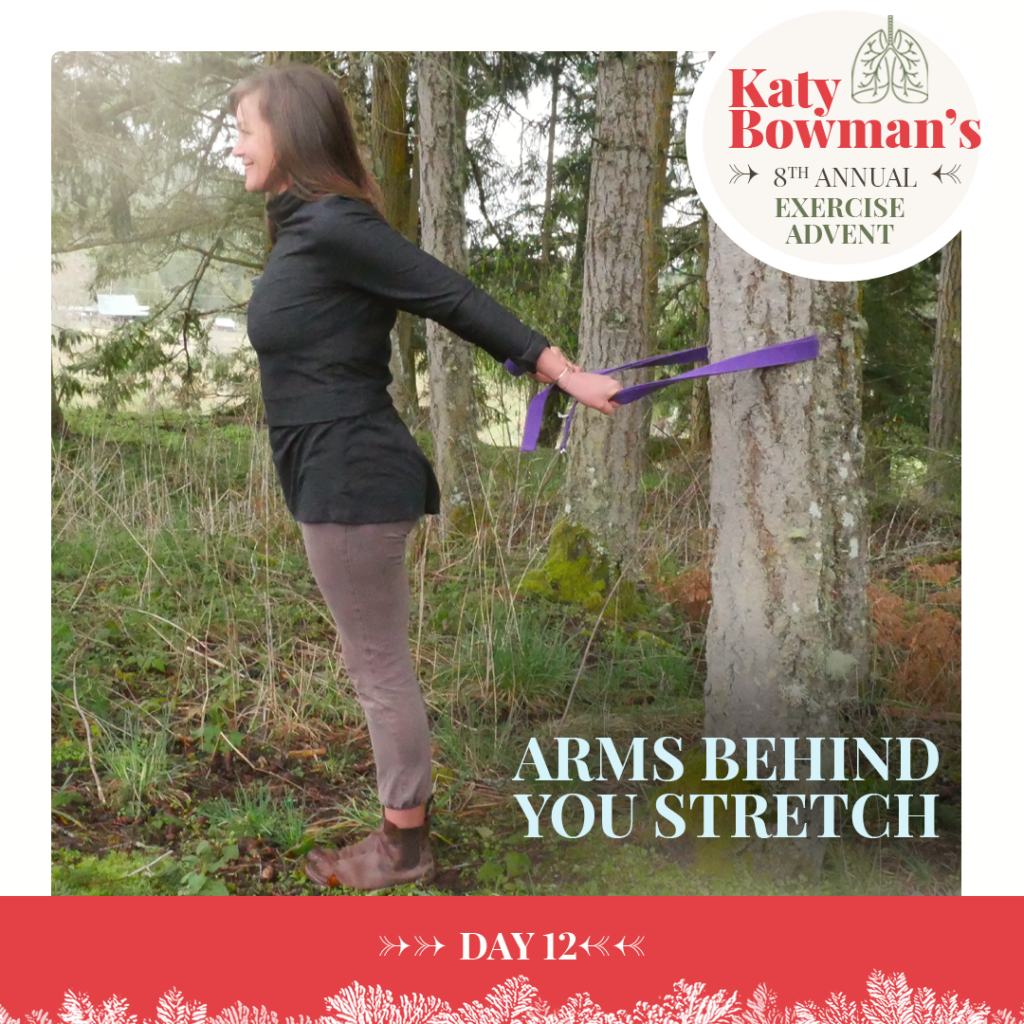
Day 12: Arms Behind You Stretch
More chest and shoulder movements! There are two levels to this move. Pick one or try them both! The first one takes more mobility, but it also uses a door frame, which more people might have handy.
Stand inside a door frame.
Reach your arms back to grasp the door casing.
Lean forward to stretch your chest and shoulders; relax your neck by dropping your head forward. Breathe here, 10-20 times, seeing if you can move those ribs!
If your shoulder tension needs more space:
Find a thin tree or a pole
Loop a strap around it and hold an end in each hand and walk forward a bit until the straps pull back and stretch your chest and shoulders.
Relax your neck by dropping the head forward if you’d like and try 10-20 slow breaths.
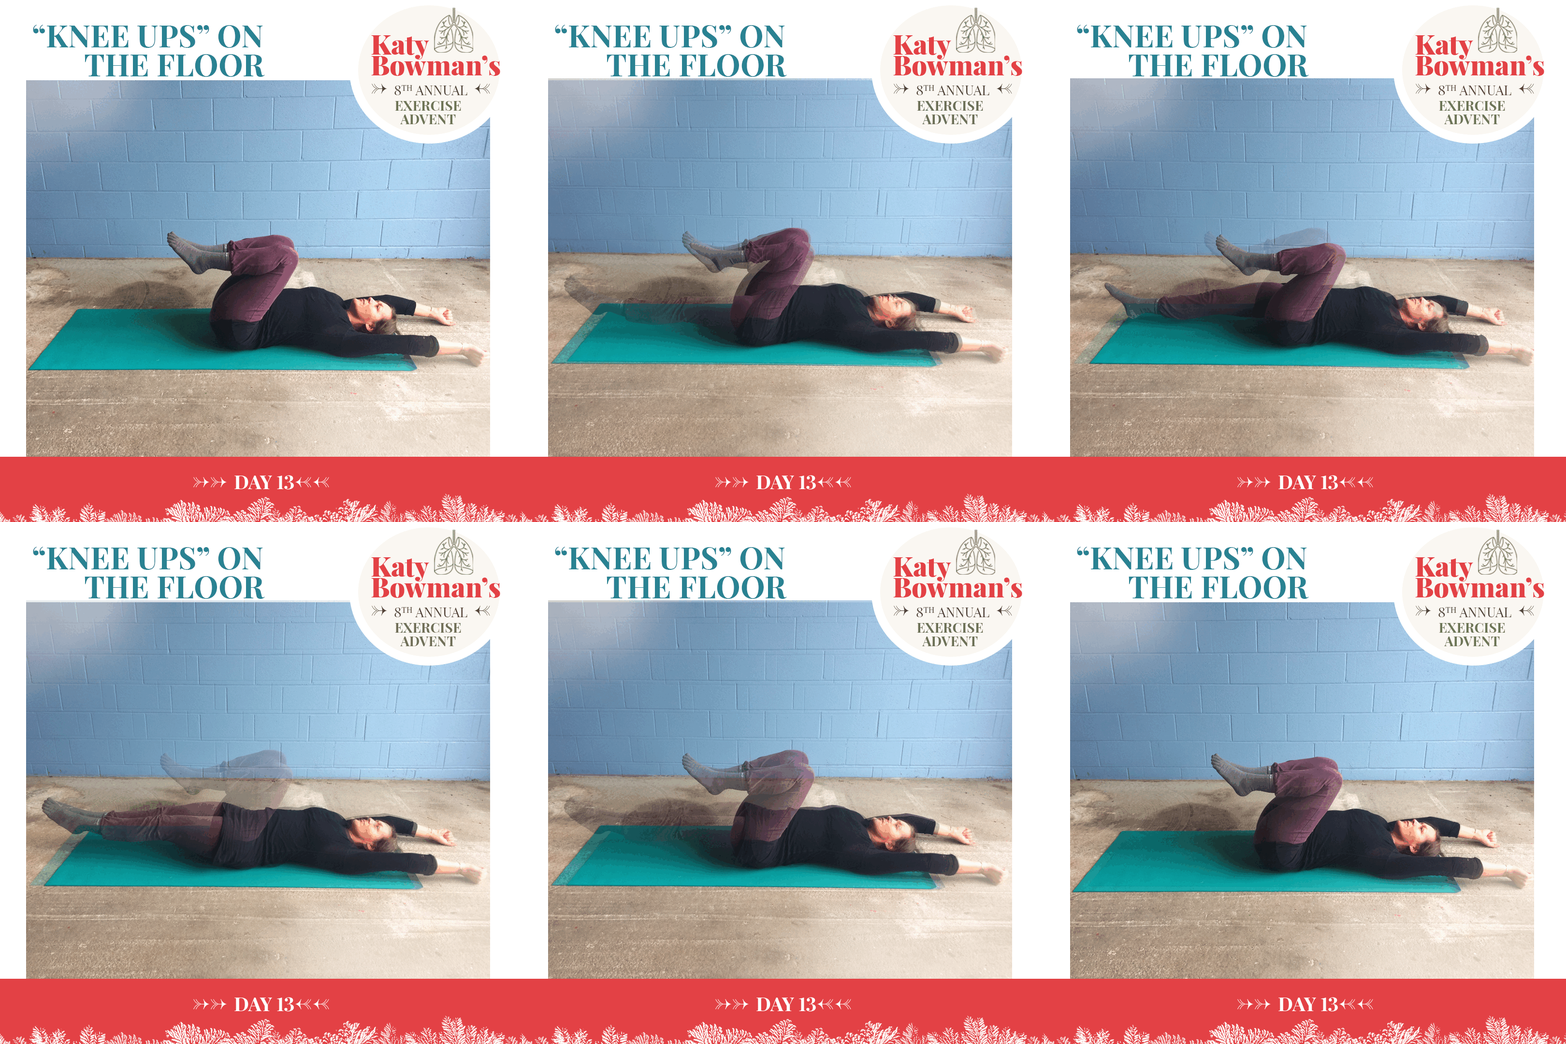
Day 13: “Knee Ups” on the Floor
We’re coming back to some abdominal moves. Specifically the test here is to be able to breathe smoothly throughout the move, no holding your breath at any point. If you find yourself having to valsalva or gasp air, then reduce the load by not doing two legs, but one at a time. And if doing one leg at a time is too much, don’t straighten it all the way, or straighten it all the way but not so low to the ground.
Start on your back, knees drawn toward the chest, arms overhead and ribs down. Note: If you have any pressure-related issues (#diastasisrecti, pelvic floor, hernias) then bolster your head and shoulders a bit to ensure your ribcage is down. Read more on that in Diastasis Recti!
Test your ability to stabilize by lengthening one leg—keep it close to the floor but avoid touching the floor if you can. Do this on both legs 10-20 times (alternating is fine) focusing on BREATH staying smooth. Go slowly so you have to breathe a couple times as you straighten a leg, and a couple times as you bring it back in.
Then, it’s time to try both legs at the same time! Again, ribcage staying down and your breath staying even is the goal. If one leg at a time is challenging enough, stay there. If you can do it with both legs, you can modify by either extending them partially or lifting them at an angle to the floor (vs. directly along it).
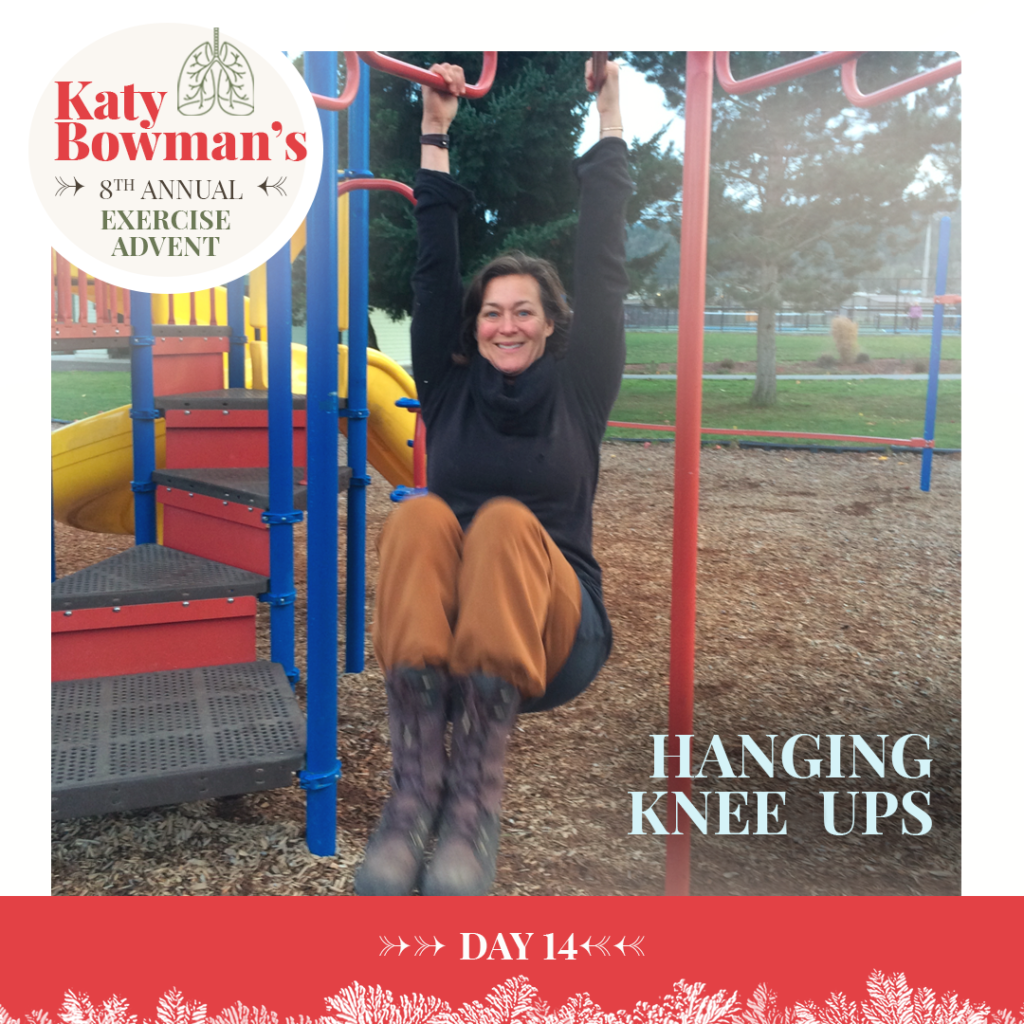
Day 14: Hanging Knee-ups
We’re taking yesterday’s exercise and going vertical.
Source a bar or branch to hang from.
As you did yesterday, pay attention to keeping your ribs down and breathing fluid as you lift both knees up toward your chest. They don’t have to come up high, but the knees should squeeze together as you lift.
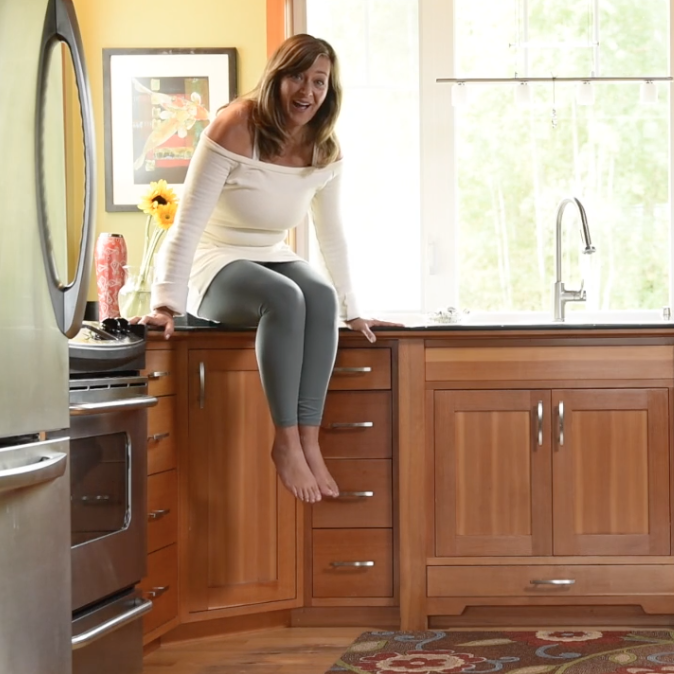
Notes: You can do this one leg at a time (just keep the knee on the midline). If you don’t have a bar, you can do this using a corner counter if you have one!
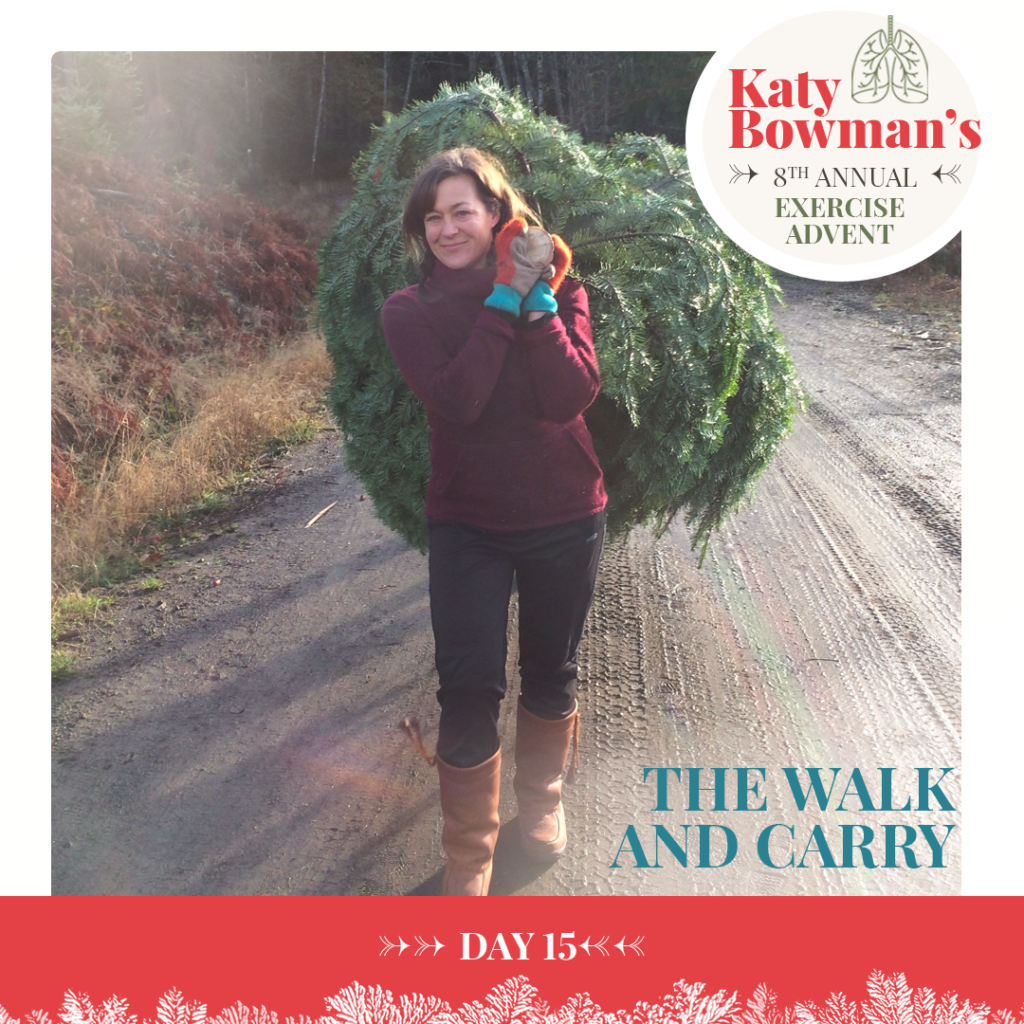
Day 15: The Walk and Carry
We’ve been working on exercises that make our breathing parts more mobile, so they can hinge or rotate as they need to as we do things that increase our oxygen demand. Now we need movement that increases our oxygen demand so these parts can be moved in response. Get it?
Walking is a foundational movement, and can gently increase our demand for oxygen, which is why it’s recommended again and again and again. The heavier a body is, the more oxygen is needed to move it. After walking regularly, our anatomy adjusts (more capillaries!) so we can feed our parts more oxygen all the time, so movement gets easier, i.e. less “huff and puff.”
How do you make walking harder, i.e. make you breathe harder? You can add hills (see Day 2 Step Ups) or you can add weight by CARRYING something. Adding a load is a simple way to make your standard walking routine MOVE YOU MORE.
The weight can be anything: a backpack, a bag of groceries or books, a kid, a kettlebell, etc. The more you #varyyourcarry—that is, to hold your weight in different ways as you walk—the more parts you’ll involve in your walk. Find a challenging load you can walk with and head out, paying attention to how it moves your breath differently than without the load.
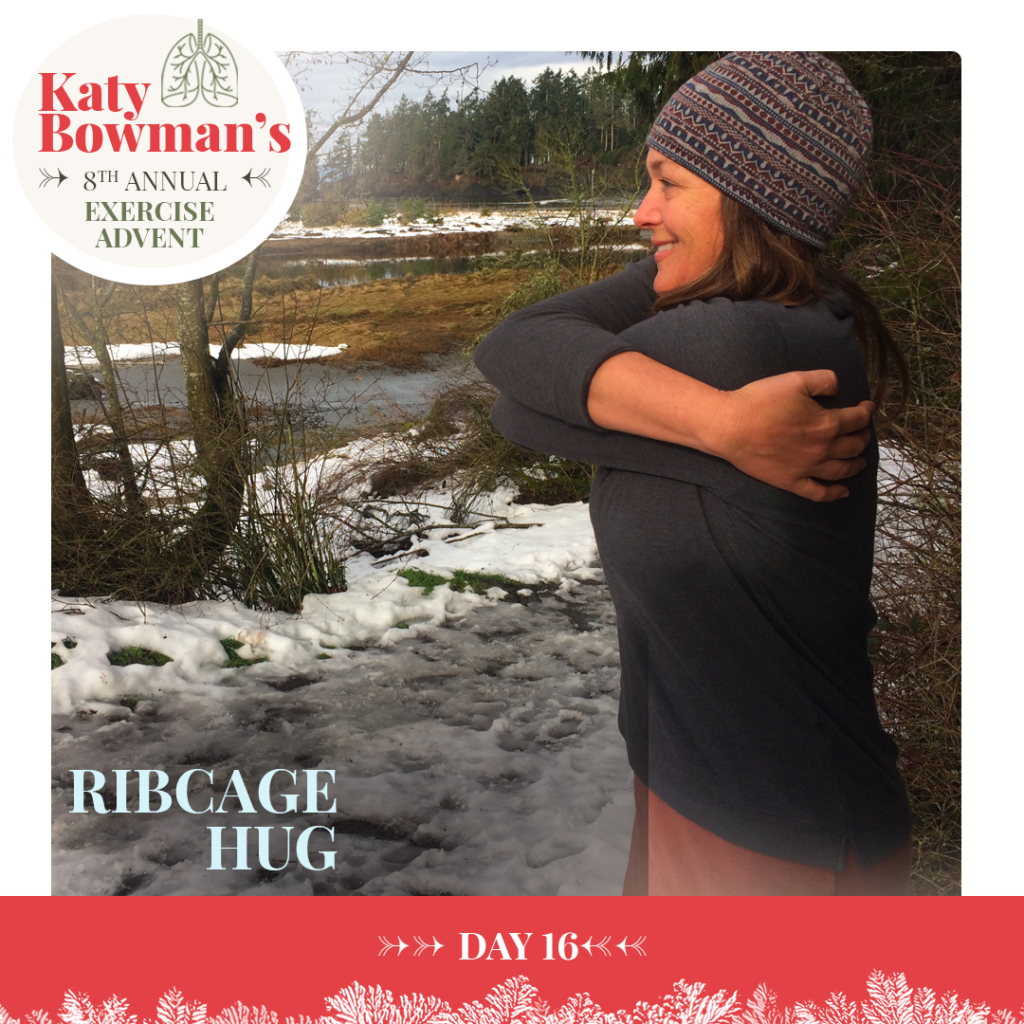
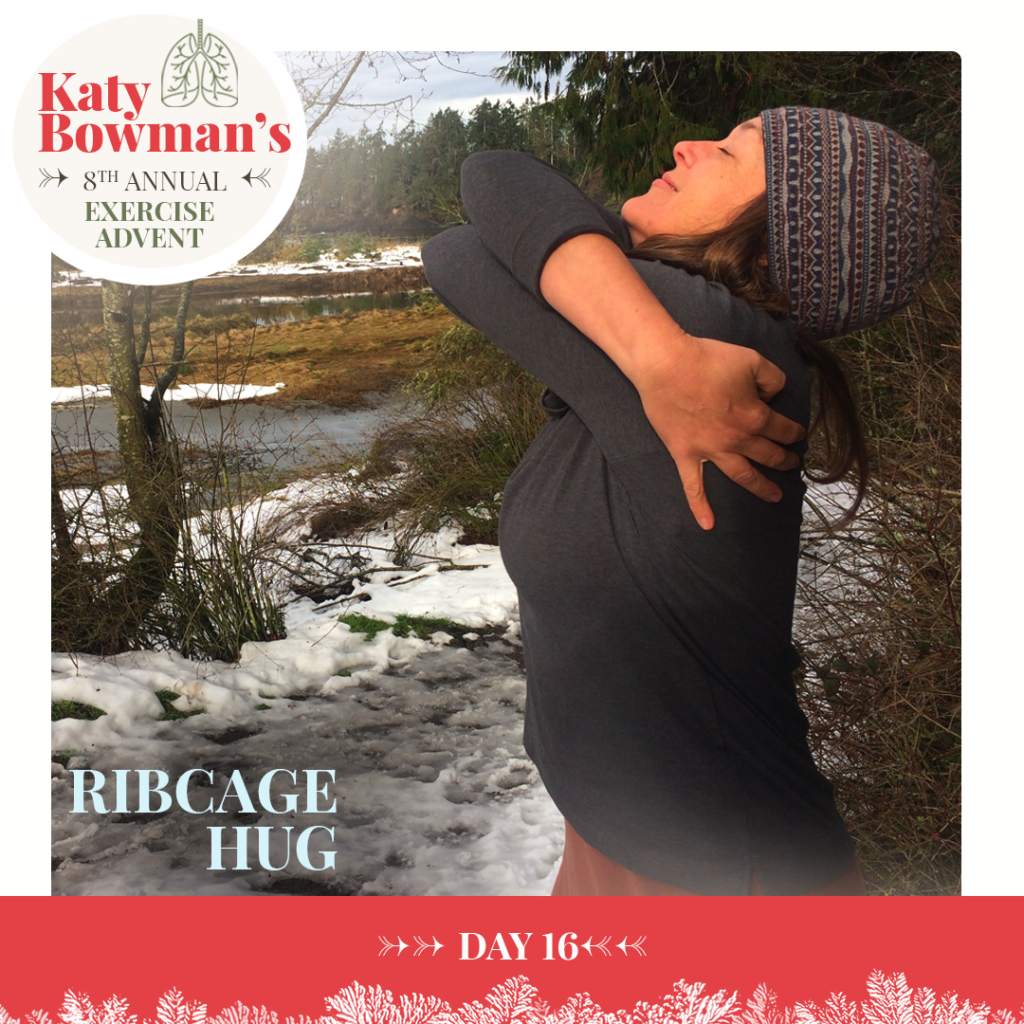
Day 16: Ribcage Hug
Give your ribcage a wrap around!
Start by putting down the phone (you're welcome). Then, give yourself a hug, working your hands as far behind you on your back as you can.
Relax the head forward and take 3-4 slow breaths. Work to make your ribcage get larger as you inhale, smaller on the exhale.
Next, lift your head and lift your elbows (keep the ribcage down) and breathe in this position a few times.
Repeat, crossing the other arm on top!
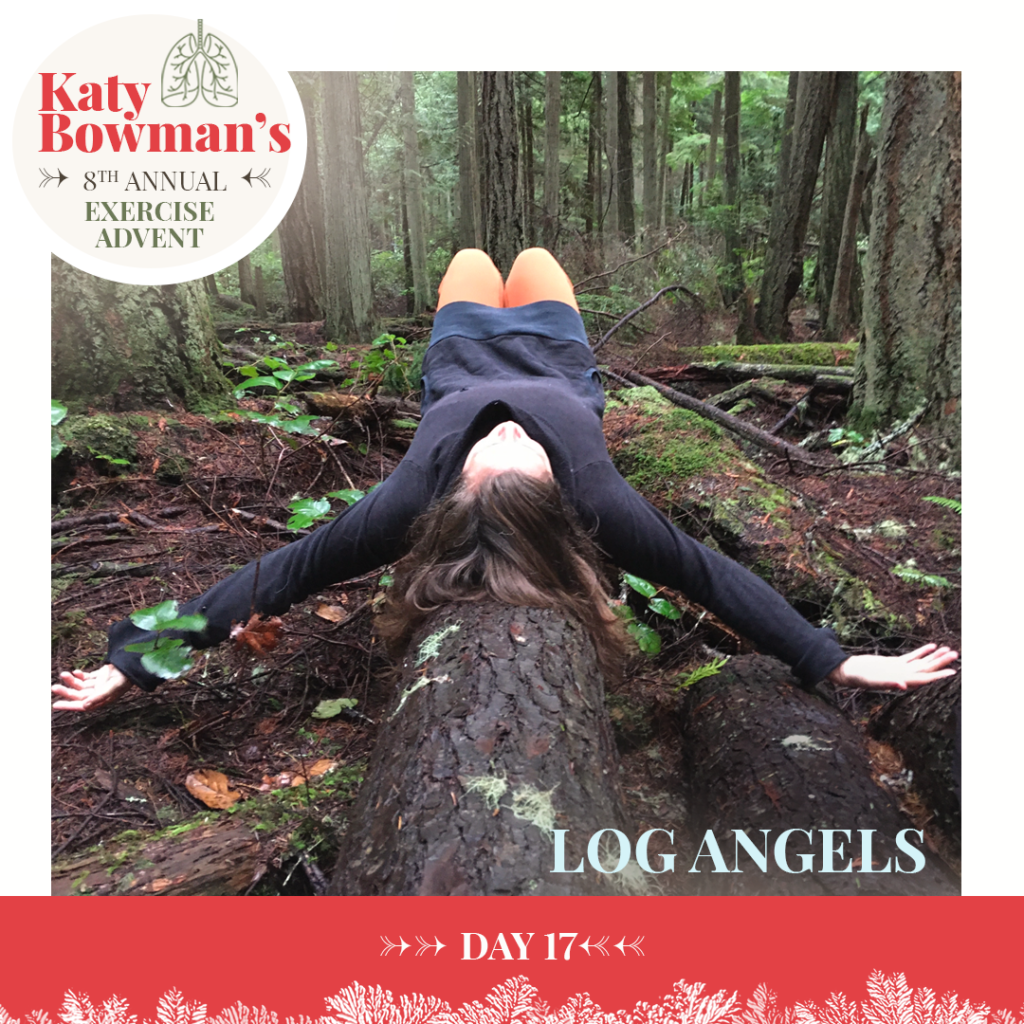
Day 17: Log Angels
How many hours do you spend with your arms in front of you? How many minutes with them behind you? Well, here’s a few more minutes you can log. GET IT?
Floor Angles are one of our vintage moves. Key to this move is propping your chest up on something narrow enough to let your arms fall behind you. If you don’t have a log or thin bench, a bolster, folded towels, or sleeping bag can do the trick.
On a log, lie on your back or, on your back with your bolstering beneath your head and upper ribcage—not under your lower ribcage though; it needs to be able to move toward the floor—let your arms stretch out to the right and left, palms up, dropping behind your torso as possible.
TAKE A MILLION DEEP BREATHS, YOU ARE ON DAY 17!
Here’s the angel part: Sweep your arms towards the top of the head and back down toward the hips, i.e. a “snow angel” motion. TAKE ANOTHER MILLION DEEP BREATHS, YOU GOT YOUR ARMS BEHIND YOU!

Day 18: Howl at the Moon
Singing, talking, any vocalizations are just super-directed exhales (our breathing muscles aren’t only breathing muscles–they also have other things they do). Exercise is one way to move your breathing parts, but so is vocalization.
Whether you’ll be howling at the moon or singing carols, setting aside time to sing loudly for a few minutes or just belt out a long sustained note is really good for these parts.
If you really go for it – the howl, that is – you’ll find your core muscles (abdominals, pelvic floor, diaphragm) will get involved reactively to help you move the last bit of the smooth muscle of the lungs.
This is one you really don’t want to miss. If you’re embarrased you can sing or howl into a pillow, but please, give it a try. You might even ENJOY it (and if you have a dog they’ll really enjoy it too. Finally, their people SAY something)! OOOOoooooooooooooooooooo.
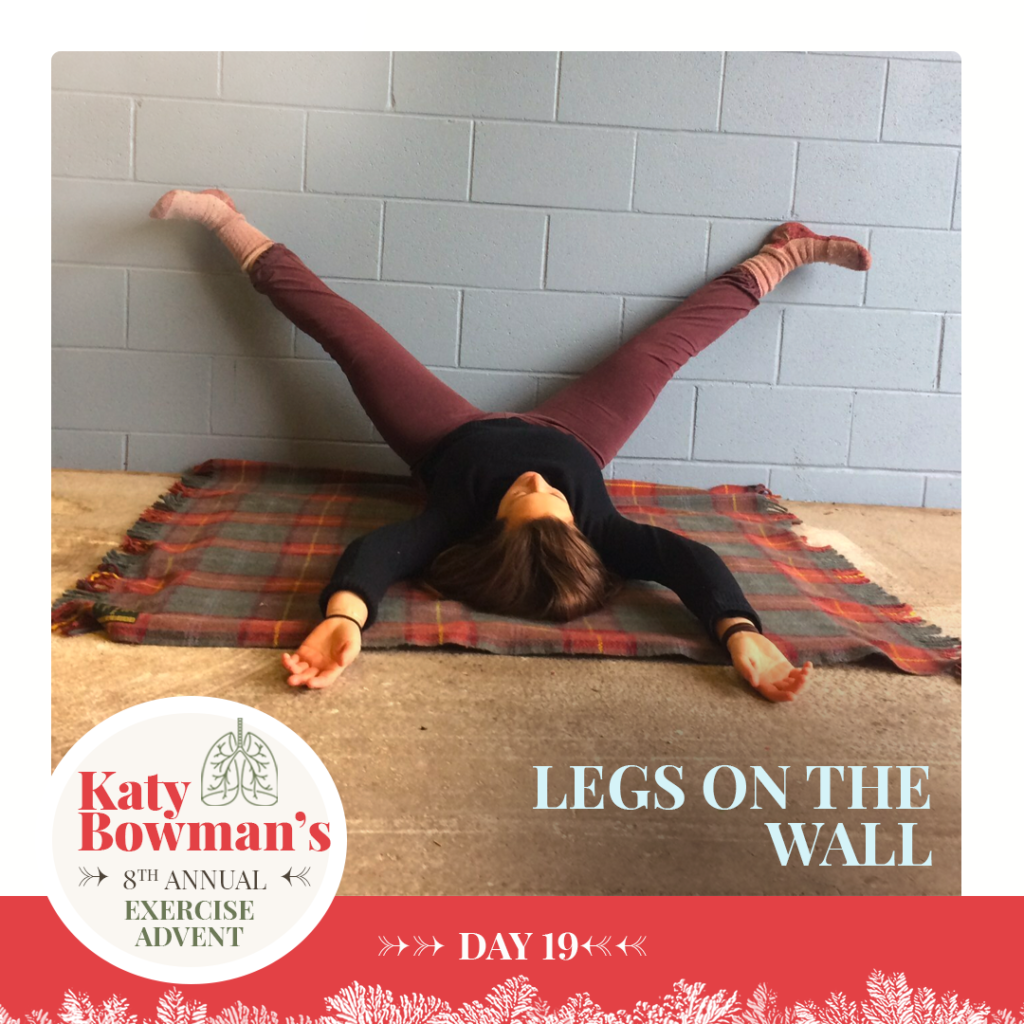
Day 19: Legs on the Wall
Home stretch, peeps. Literally.
Today we’re pairing a leg move that can be challenging with the art of breathing through it.
Start by sitting sideways to a wall, then turn to lie on your back and bring the legs up the wall. You can back your butt away from the wall if your hamstrings need you to. Then, drop them open as you can.
Reach your arms overhead on the ground or out to the side and take slow deep breaths until you need to take a leg-break.
Repeat 2-100 times depending on how much time you have. And, if you’re reading or spending time scrolling you can do that while you do this move as well, right?
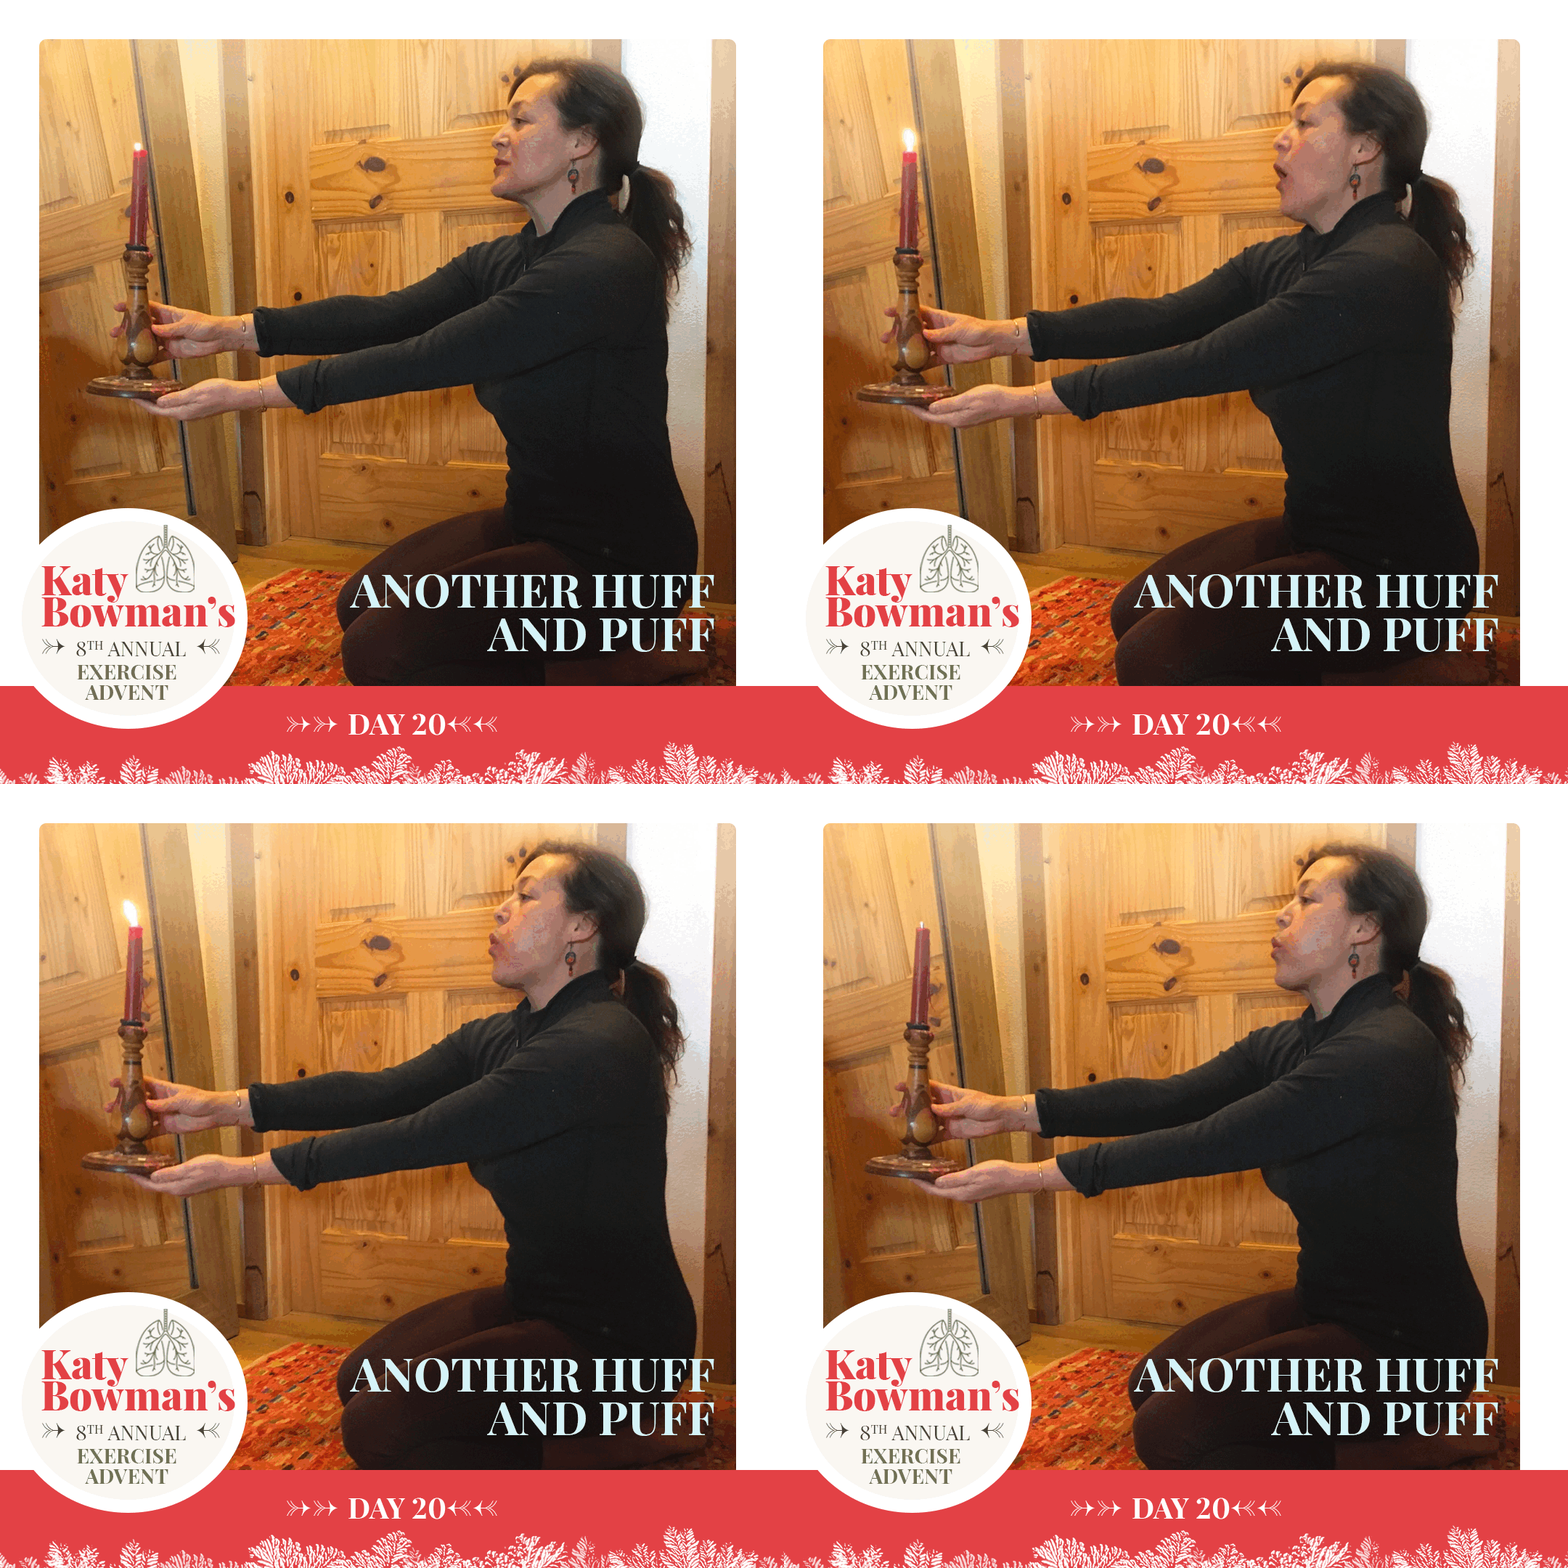
Day 20: Another Huff and Puff
A strong EXHALE is key to a big inhale, so training your exhale muscles are key. Howling/singing was one way of making that outgoing breath stronger and today’s move is another: work on blowing out a candle–starting close(ish) and then moving it farther and farther away until you can’t. If you can blow it out while a couple feet away, you’ll start to notice those same “singing” core muscles coming in to assist. The inner intercostals, diaphragm, abdominals, and pelvic floor are breathing muscles too, but they’re coordinated better when you challenge your breath. Being at rest most of the day leaves this team of levers and pulleys seriously under-moved which means the LUNGS THEMSELVES are under-moved in the sense that they are rarely pulled through their full range of motion.
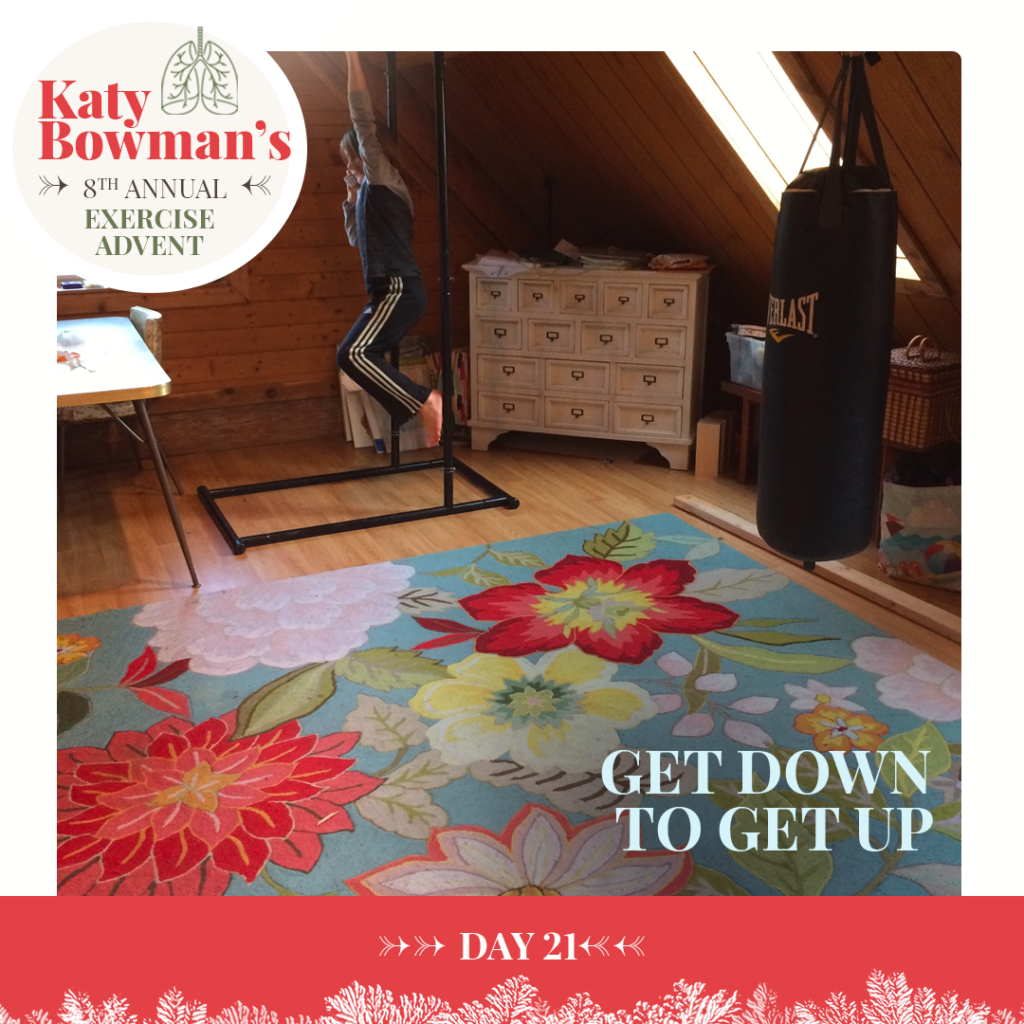
Day 21: Get Down To Get Up
Here’s another movement to get your breathing parts moving by increasing your body’s demand for oxygen.
We don’t have a lot of furniture in our house on purpose: we wanted to make space for movement in the place we spend the bulk of our time. We also have a variety of exercise equipment as you can see (my kid is talking on the phone, but it doesn’t mean he has to stop moving), but the most important piece we have, and the one you have too, is the floor.
A simple way to get your breath rate up (no matter the temperature outside) is to get down to the floor and back up 10 times (or however many times you can) in a row. Again, the point with these is to pay attention to how your breathing changes with whole-body movement. I think many have forgotten how movements of the heart and lungs relate to movements we do with our whole person. This is a chance to tune back in: the only way the heart and lungs get the movement THEY REQUIRE is by moving the rest of your body.
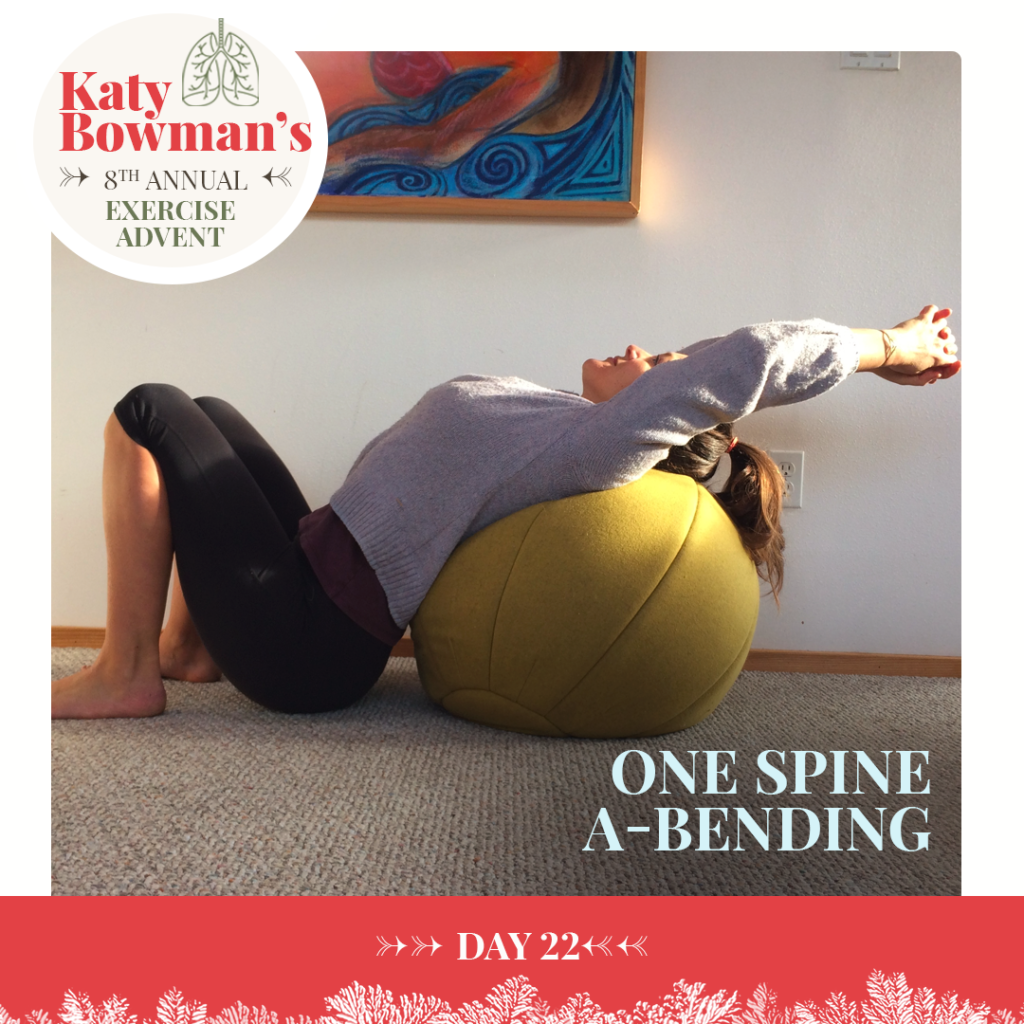
Day 22: One Spine-A-Bending
There is a direct relationship between the curve of your upper (thoracic) spine and your ability to breathe well. This is one of the reasons we want to be aware of and deal with hyperkyphosis–excessive curvature in the upper back. Our lungs need all the space we can get, and the greater the curve of the spine, the more it encroaches on thoracic cavity space.
You’ve already been working on this a bit (see the move from Day 3: Thoracic Stretch on the Wall) but today we deepen the extension by relaxing backward over something supportive. I’m using a ball but you could also do this over the arm of a couch or a rolled sleeping bag.
Reach your arms overhead to get more shoulder and thoracic spine movement, and yes, keep your ribcage down! (And yes, #diastasisrecti peeps, you can do this, but #ribsdownribsdownribsdown is your focus!) Have fun!
Day 23: 12 Vertebrae-A-Stretching
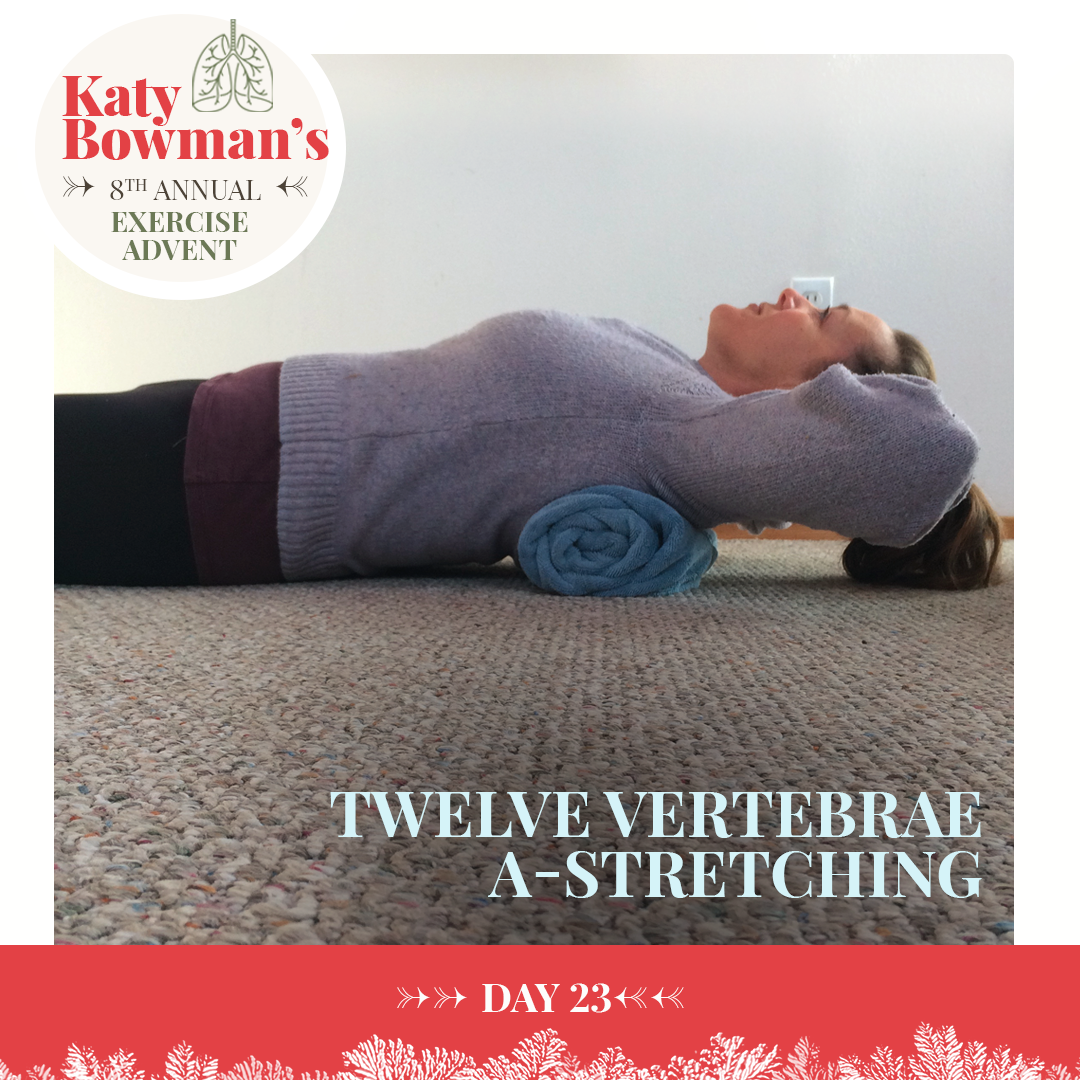
After you’ve stretched the thoracic spine as a whole, you can work on getting a little more movement by working on the extension between each vertebra.
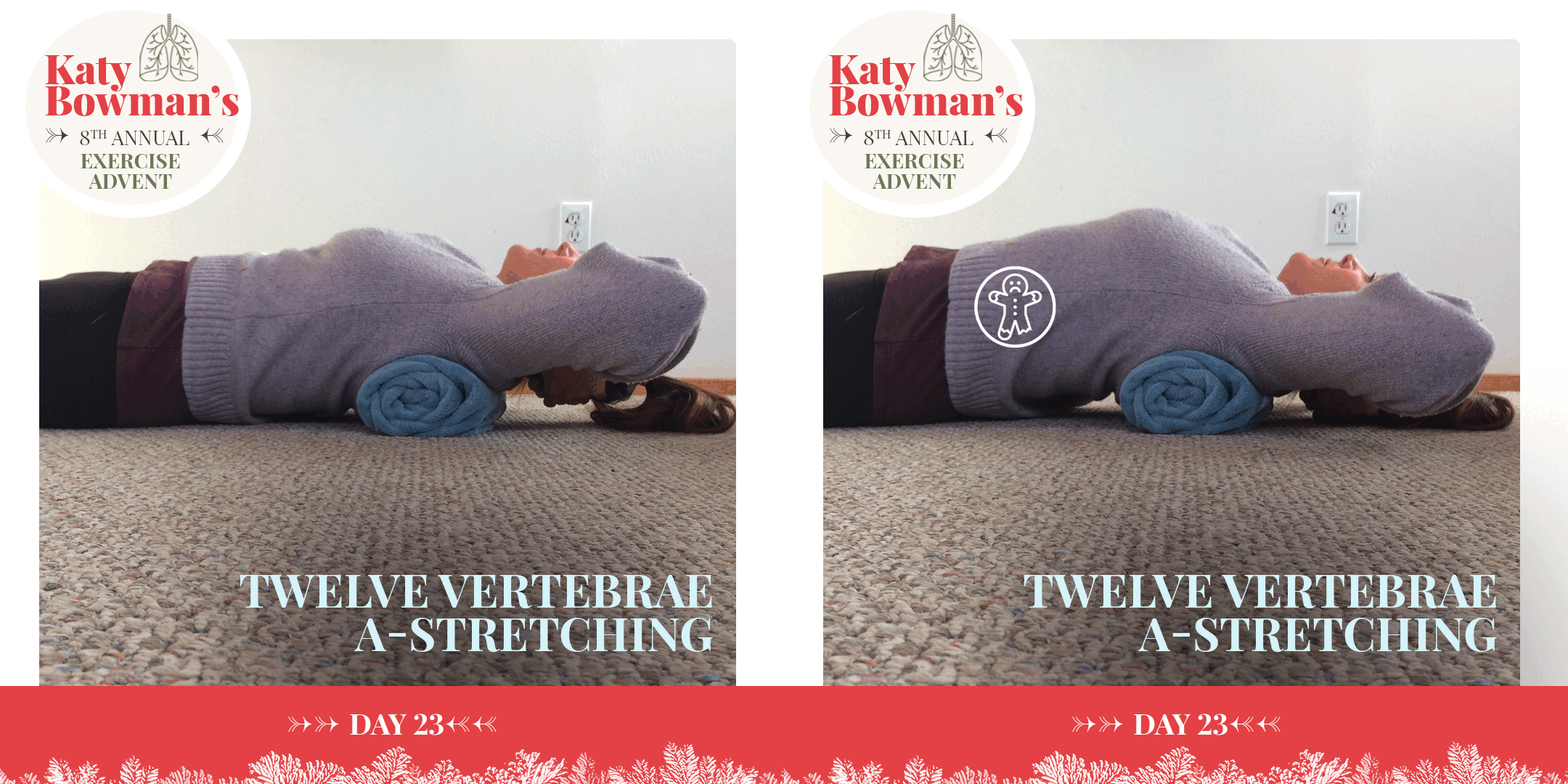
Lie back on a rolled towel, half or full foam roller (pic 1). The most important piece is to keep the bottom of the ribcage from lifting as you lower a supported head over the other side. (See slide 2—keep ribs down!)
The point isn’t to get the head to the floor (it might get closer) because if you’re keeping the ribcage in place, each vertebra can only move a little bit. Start at the top of the spine and scoot down a few inches at a time and repeat the move, so you're loading between each vertebrae. Breathe!
Day 24: The “That’s A Wrap” Twist
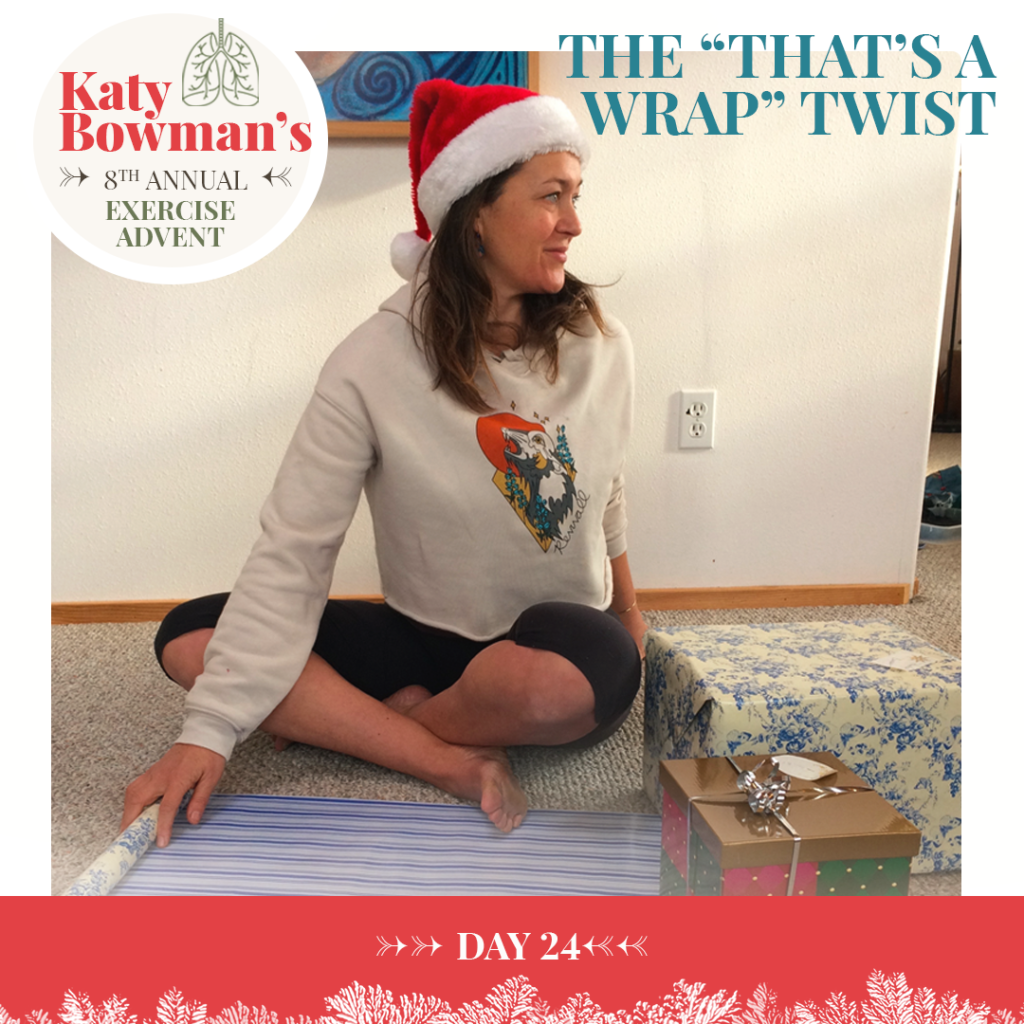
Today's move is idea #9 from this article on how to celebrate your holidays dynamically:
Stretch while you wrap
There's a lot of sitting to be found in daily life, but there's nothing saying it all has to be done in a chair. If you're going to spend an hour or two gift wrapping, set yourself up on the floor (add a folded blanket or cushions as needed) and move through a variety of active positions as you're working. Sitting with your legs crossed, in a V-shape, or stretched out in front of you is a simple way to care for tight leg muscles and stiff joints. Just holding up your own torso instead of resting it on the back of a chair works your core muscles more and uses more energy, too.
Here I’m modeling one of my favorites: a spinal twist. Whatever task you’re working on, see if you can lower it to the floor (or to a couple stacked cushions or blankets) and sneak a little body nourishment into something else you’re doing anyway. A nutrient-dense life is what we’re after here!