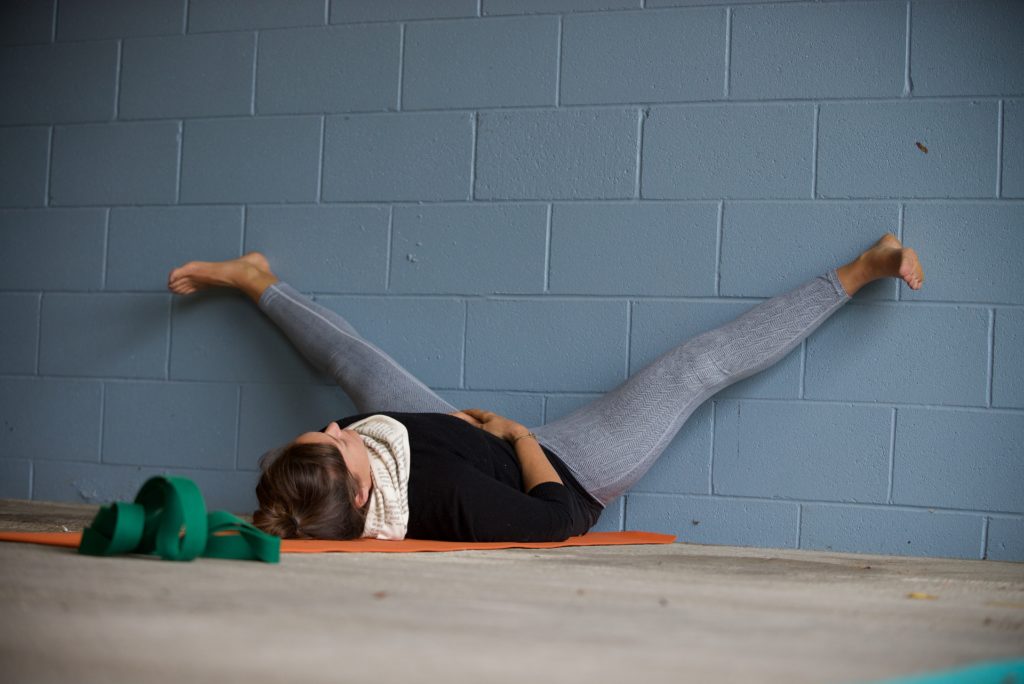
Let’s talk about the muscles of your inner thighs. The adductor group or “adductors” are muscles that connect to both your pelvis and either your thigh or lower leg bones. When they are short and tight, it makes it hard to open your thighs away from each other (as you do during our Legs on the Wall exercise pictured above).
This is why they are named adductors in the first place; their motion brings the legs together. However, because of where they attach, adductors can also affect your lower back, pelvis, knees, and pelvic floor. They can also affect how well your leg can move forward and back when walking, how well you can squat down, and how comfortably you can sit on the floor.
Now that we’ve talked about these muscles, let’s move them. Below is an excerpt from Diastasis Recti that includes 5 adductor exercises (because when it comes to core strength, the inner thighs are important to know about). Give them a try!
INNER THIGHS
We don’t do much with our legs beyond walk to the next chair. Well, maybe we’ll go for a run every now and then, but even then, we mostly use our legs in front-to-back motion, and hardly use any of the complex actions of our hips. This lack of complex use can leave the muscles of the inner thigh particularly weak, tight, stiff, and sore, and can over-connect the movements of the leg to the pelvis and vice versa.
The groups of muscles that form your inner thigh (their anatomical names are the adductors, medial hamstrings, and medial quadriceps) run between the pelvis and the thigh and/or the pelvis and your shin. When these muscles are tight, movements of your leg can carry the pelvis with them unnecessarily, sort of like a dysfunctional relationship can take you to places you weren’t intending to go.
Knee Out to the Side
Since we want to break up the motion between the thigh and the pelvis, we need to make sure that the pelvis doesn’t move (much) during the next two exercises.
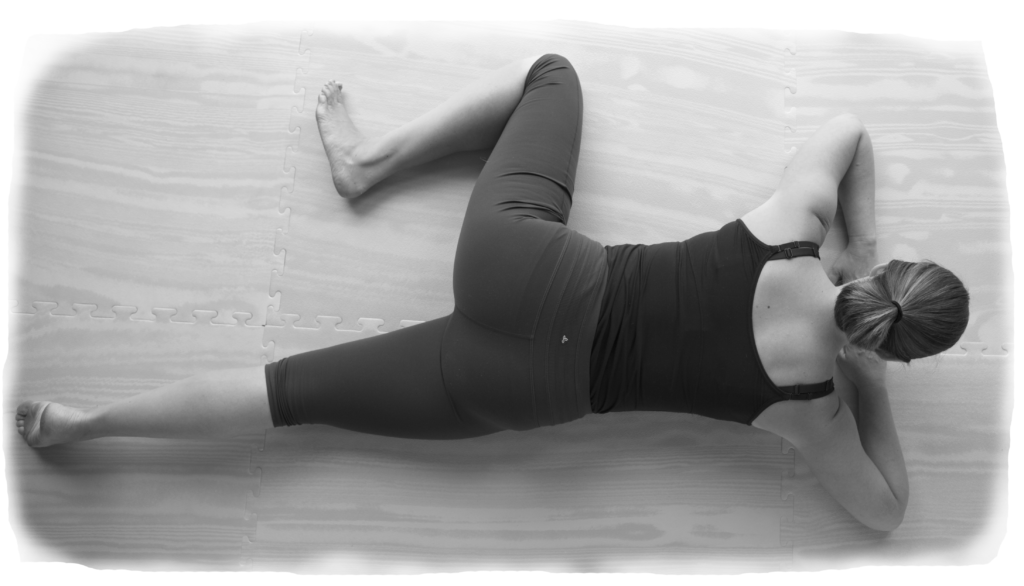
Lying face down with your belly on the floor, slide your left knee along the floor until it’s out to your side, keeping your left leg bent. If your hips are very stiff you might find that you can barely move the thigh at all without moving the pelvis. Don’t fret. Turn your pelvis so that it “faces” the knee, and see if you can get the knee higher. Once it’s closer to your head, turn the pelvis back to the floor, increasing the stretch. Hang out in the most comfortable place between knee up to the side and pelvis flat on the ground. You can be slightly uncomfortable with a stretching sensation, but don’t force your body into any position.
Leg Out to the Side
Again, you’ll be starting face down, and again, you’ll be trying to (eventually) move your leg without moving your pelvis. Following the same rules as in Knee Out to the Side but with a straight leg, scoot your leg up toward your head, sliding it up along the floor. Bring it up as high as you can without lifting one side of the pelvis away from the floor or hiking one hip up toward your ribcage. A common cue I’ll give when leading this exercise is: “keep the right and left sides of your waist the same length.
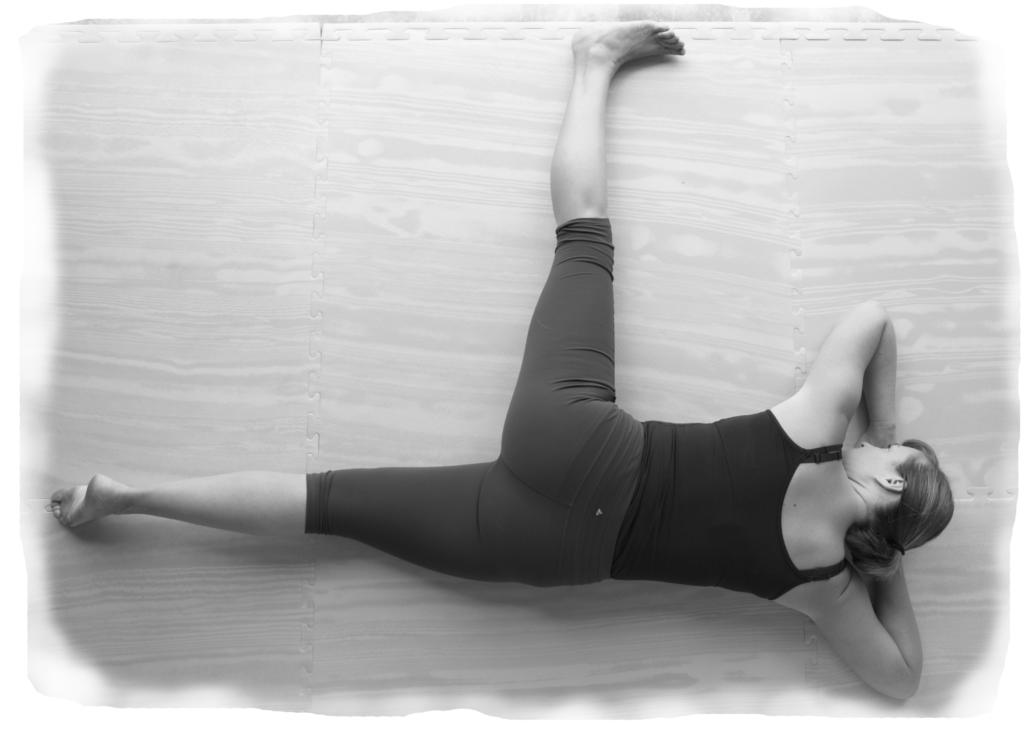
As you advance, try to externally rotate the stretching leg by rolling your thighbone so the toes on that foot point more toward the ceiling and less toward the floor. Rest your head and neck on your hands, hanging out here or in some modified position that allows you to relax.
Supine Soles Together
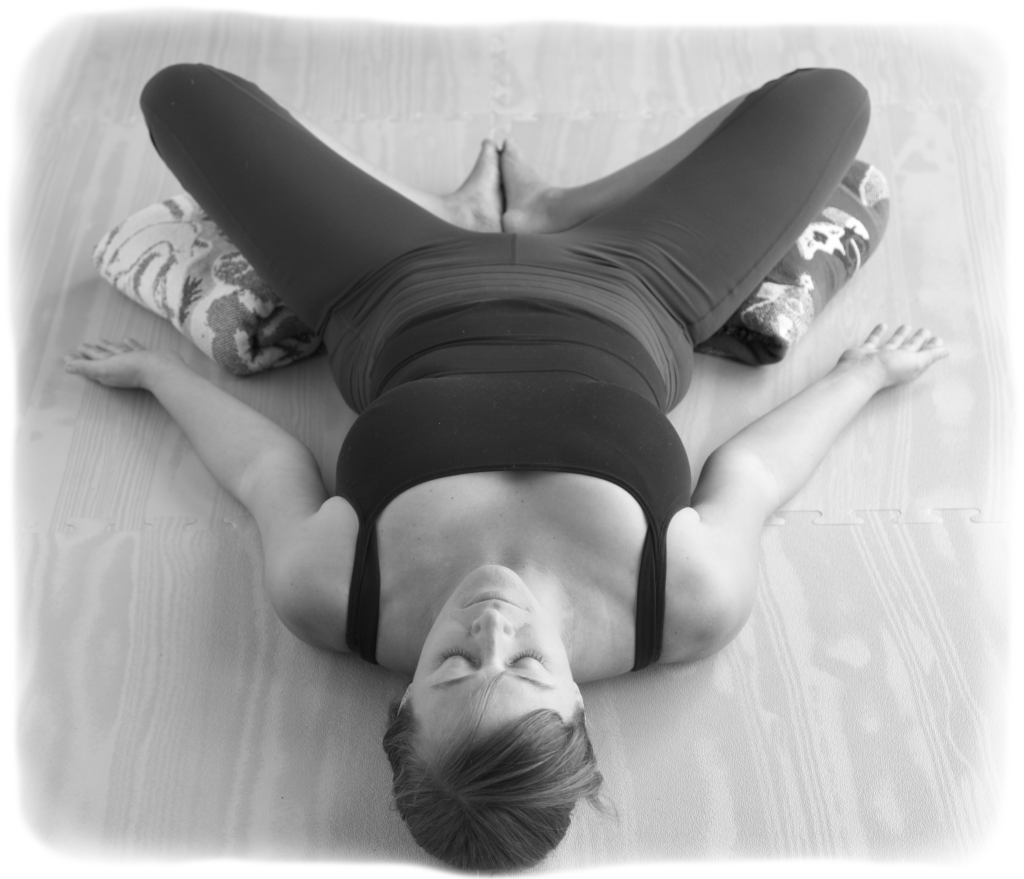
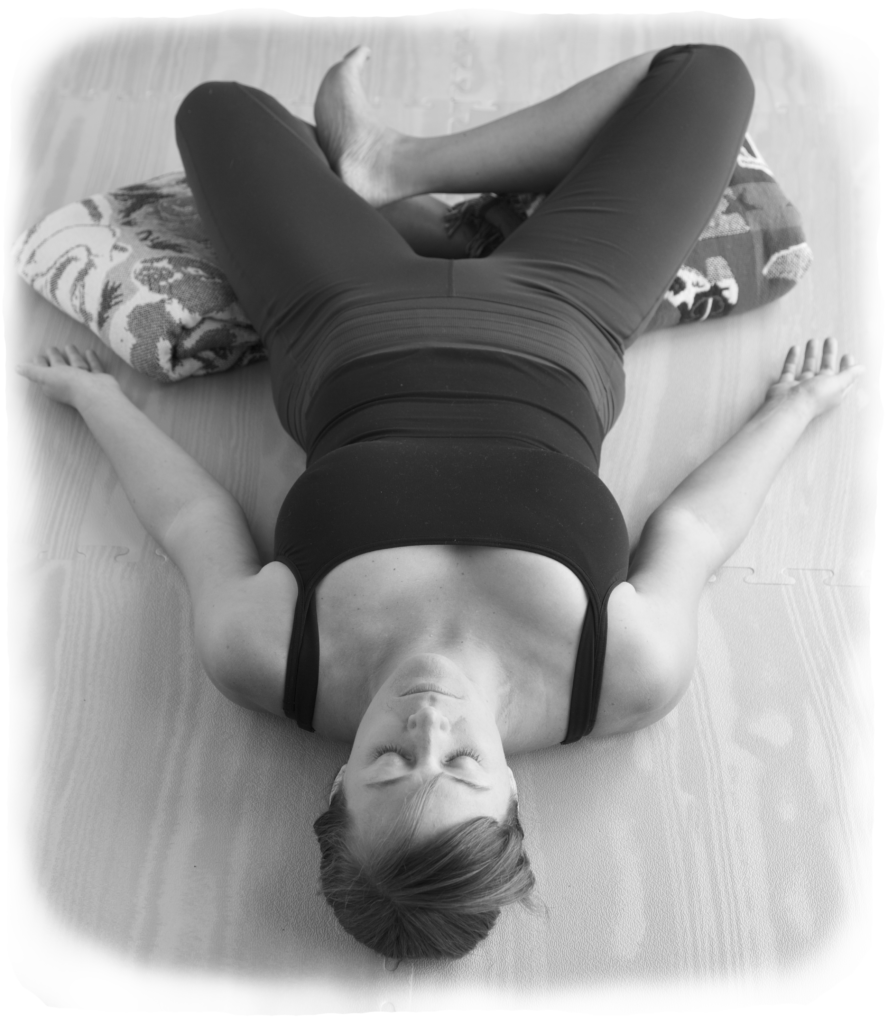
Lying on your back, bolstering the ribs as necessary, bend your knees until the soles of your feet are touching, then drop your knees out to the sides. If this is too much of a stretch for your groin, place pillows under each knee to support you in this position. Lower the support bolsters as the position becomes more comfortable.
Supine Stacked Legs
Starting from the position of the last exercise, cross your ankles to place one ankle on top of the opposite shin. Let both knees drop toward the floor, bolstering them as necessary.
Wide Squat with Sit-Back
Starting on your hands and knees (don’t forget to mind your ribs), widen your knees so they’re wider than your pelvis. Then sit back toward your feet without tucking your pelvis. Once your pelvis starts to tuck, STOP. Pelvis tucking marks the end of your hips’ range of motion, which is where you should be doing this exercise.

If you are very new to this motion and it is causing your body to tense or hurt, you can reduce the load by doing it on a bed or other soft or squishy surface, or place one pillow or blanket behind your knees (so they aren’t forced into flexion), and one under your ankles so that gravity doesn’t force you beyond your current ranges of motion.
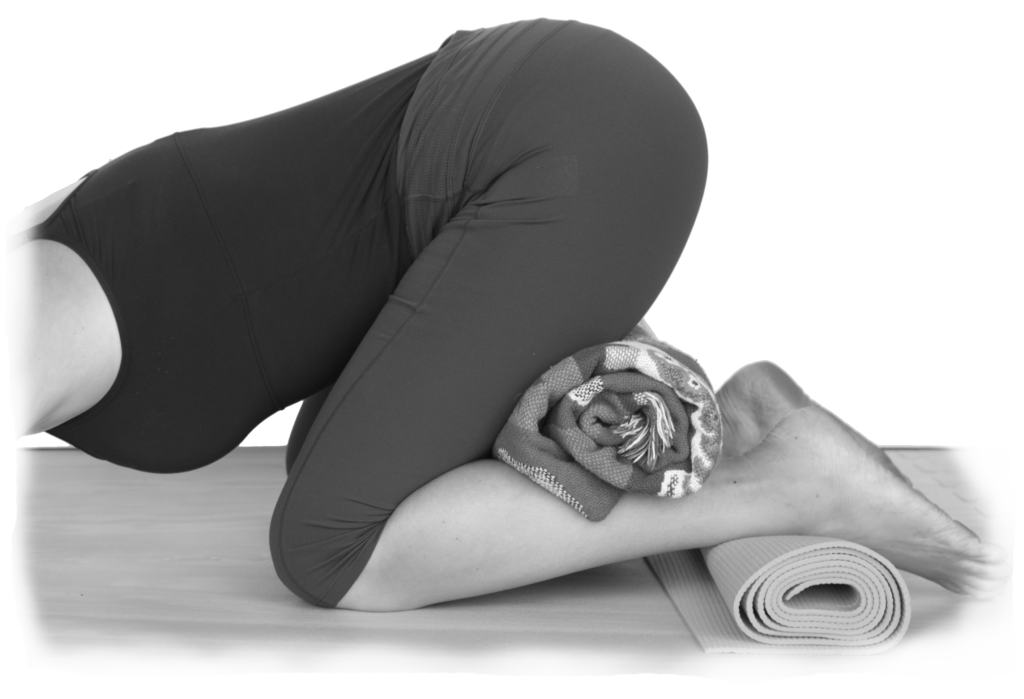
Once you’re as far back as your pelvis can go without tucking, shift your pelvis from side to side, gently, to see if there’s any tension deep in the hips. You can also do this exercise at different knee-widths; each width provides a different load!
Find all of these moves in Diastasis Recti: The Whole-Body Solution for Abdominal Separation along with a bunch of other moves for the core, pelvis and shoulders. If you're looking for a book/video combo, check out our Move Better in the Middle Kit.